
Lawn
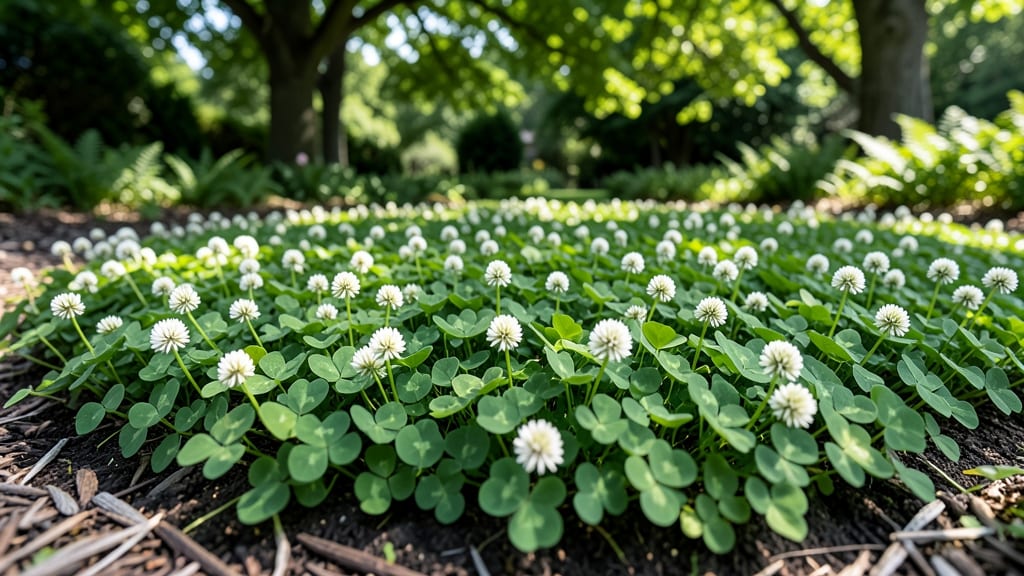
A clover lawn in the PNW isn’t just possible—it’s the secret weapon for a low-maintenance, drought-resistant green space that thrives where grass struggles. 🌿 I’ve watched my neighbor’s patchy bluegrass lawn transform into a vibrant, self-healing carpet of clover after just one season, and the difference is night and day.
The PNW’s wet winters and dry summers make clover the perfect fit—it handles both without wilting or turning muddy.
White clover and Dutch white clover are the top picks for the region, thanks to their shade tolerance and ability to fix nitrogen in our often-acidic soils.
Planting in early fall or spring lets the seeds establish before summer heat, and a simple rake-over method works just as well as sod for most yards. The real game-changer? No mowing every weekend—just a quick trim every few weeks to keep it tidy.
You’ll end up with a lawn that stays lush and green even when grass browns out, resists weeds naturally, and requires half the water of traditional lawns. The trade-off?
A slightly softer surface (great for barefoot kids, not so much for croquet), but the time and money saved make it worth it. Plus, bees and pollinators will thank you.
PNW-specific challenges like slugs or fungal diseases have easy fixes—just adjust watering and choose the right variety. Let’s get your lawn growing the way it should, without the fuss.
📚 In This Guide
- What you need
- Instructions
- Tips and common mistakes
- Wrapping up and next steps
What you need
- ● Clover seed mix: 5–10 lbs (depending on lawn size). Opt for a Pacific Northwest-resistant blend (e.g., Dutch White Clover + Micro Clover for shade tolerance).
- ● Soil amendment: Compost (2–3 inches, spread evenly)
- ○ Optional: Slow-release organic fertilizer (e.g., 10-10-10, 1 lb per 100 sq ft)
- ● Tools: Broadfork or garden tiller (for aeration)
- ● Rake (bow or leaf rake, for leveling)
- ● Spreaders (hand or broadcast, for even seed distribution)
- ● Watering system (hose with adjustable nozzle or sprinkler)
- ○ Optional: Lawn roller (for compacting soil post-seeding)
- ● Test soil pH (ideal: 6.0–7.0). Adjust with lime (to raise pH) or sulfur (to lower) if needed.
- ● Clear debris (rocks, weeds) from the area. Pro tip: Use a pre-emergent herbicide (like corn gluten meal) 2 weeks before seeding to deter weeds.
- ● Choose a PNW-friendly time: Late summer to early fall (Aug–Sept) for best germination.
- ○ Optional: Soil test kit (to analyze nutrients like nitrogen, phosphorus, and potassium).
Step-by-Step guide to establishing a Pacific Northwest clover lawn
Here's how to create a resilient, drought-tolerant clover lawn that thrives in the PNW's cool, wet climate.
🌱 Step 1: Prepare the Soil for Optimal Drainage
Test your soil's pH first—clover prefers a neutral range of 6.0-7.0. If your soil is too acidic, amend it with lime before planting. The PNW's heavy clay soils often compact easily, so till in 2-3 inches of compost to improve aeration and organic matter content. I like to work this in during the cooler months when soil is easier to handle.
Rake the area smooth to eliminate any clumps or debris. The goal is a fine, crumbly texture that won't smother young clover plants. For existing lawns, remove all grass first using a sod cutter or glyphosate application followed by tilling. Don't rush this step—proper soil prep makes all the difference in clover establishment.
✂️ Step 2: Choose and Plant the Right Clover Mix
For the PNW, select a mix containing white clover (Trifolium repens) and red clover (Trifolium pratense)—both tolerate cooler temperatures and thrive in partial shade. Plant seeds at a rate of 4-6 pounds per 1,000 square feet, which should give you full coverage in 4-6 weeks under ideal conditions. Spread seeds evenly by hand or with a broadcast spreader, then lightly rake to ensure good seed-to-soil contact.
Don't bury the seeds—clover needs light to germinate. A light covering of ¼ inch of soil is all you need. Water immediately after planting to settle the seeds into place. I always mark the planting area with stakes to avoid disturbing it during the critical first watering.
💧 Step 3: Maintain Consistent Moisture During Establishment
Keep the soil evenly moist for the first 3-4 weeks, which is when most germination occurs. Water lightly but frequently—about ¼ inch per week—rather than giving heavy soakings. The PNW's frequent rain can make this tricky, so check soil moisture daily. You'll know it's right when the top ½ inch feels damp but not soggy to the touch.
Once seedlings reach 2-3 inches tall, gradually reduce watering frequency. Clover develops deep roots once established, making it drought-tolerant. Avoid walking on the lawn until it's fully mature—6-8 weeks—to prevent damaging tender new plants. This is where many gardeners fail, so don't skip this step.
☀️ Step 4: Adjust Maintenance for PNW Conditions
Mow when clover reaches 3-4 inches tall, then maintain a height of 2-3 inches to encourage bushier growth. Never cut more than ⅓ of the blade height at once. Clover recovers well from light grazing, but aggressive mowing weakens it. In the PNW, you'll likely mow less frequently than with traditional grass—every 2-3 weeks in growing season.
Fertilize lightly in early spring with a low-nitrogen, balanced fertilizer (10-10-10) to support growth without promoting excessive leafy top growth. Clover fixes nitrogen naturally, so don't overdo it. I've found that PNW clover thrives with minimal intervention once established—just occasional watering during dry spells and annual soil top-dressing with compost.
Tips & tricks for perfect Pacific Northwest clover lawn establishment
Between us, the secret to a thriving PNW clover lawn isn't just in the planting—it's in the details that separate a decent lawn from one that truly thrives. Here's what nobody tells you about making this work in our wet, cool climate.
Soil Prep is Non-Negotiable: That 2-3 inches of compost in Step 1 isn't just about aeration—it's about creating the perfect moisture balance for clover roots. I've seen too many lawns fail because gardeners skipped this. For heavy clay soils, consider adding sand (optional) to improve drainage further. The goal is a soil texture that holds moisture but doesn't become waterlogged during our frequent PNW rains.
Timing Your Planting Matters: The PNW's unpredictable spring weather means you should aim to plant when soil temperatures reach 50°F consistently—typically late April to early May. Cool-season clovers like white and red clover establish best in these conditions. If you plant too early, cold soil can delay germination by weeks. I always check soil temps with a simple thermometer before planting.
Watering Strategy for Our Wet Climate: That ¼ inch per week guideline in Step 3 can be tricky with PNW's frequent rainfall. Use a rain gauge to track actual precipitation—if you've had more than ¼ inch in a week, skip watering entirely. The key is maintaining consistent moisture without creating soggy conditions. A soaker hose set on a timer helps maintain even moisture without disturbing young seedlings.
Mowing Height is Critical: Maintaining that 2-3 inch height in Step 4 isn't arbitrary—it's about protecting the plant's ability to photosynthesize while preventing soil compaction. In the PNW, where we get more rain, taller clover helps shade the soil, reducing erosion. I've found that using a mulching mower actually improves lawn health by returning nutrients to the soil.
Pro Tips for Clover Lawn Pnw
- Between us, the secret to a thriving PNW clover lawn isn't just in the planting—it's in the details that separate a decent lawn from one that truly thrives.
- Soil Prep is Non-Negotiable: That 2-3 inches of compost in Step 1 isn't just about aeration—it's about creating the perfect moisture balance for clover roots.
- Timing Your Planting Matters: The PNW's unpredictable spring weather means you should aim to plant when soil temperatures reach 50°F consistently—typically late April to early May.
Frequently asked questions
Got questions about growing a clover lawn in the Pacific Northwest? You’re not alone!
Here are answers to the most common concerns—from planting to maintenance—so you can enjoy that lush, low-maintenance green space without the hassle.
Is clover really drought-resistant in the PNW’s rainy climate?
Yes! While the PNW gets plenty of rain, clover thrives on moderate moisture and handles dry spells better than traditional grass. It won’t drown in soggy soil (unlike fescue) and stays green with far less watering—perfect for our mild, unpredictable weather. Just avoid waterlogging by ensuring good drainage.
How long does it take for a clover lawn to establish?
Patience pays off! A new clover lawn typically takes 4–6 weeks to germinate and 3–4 months to fully establish a dense, weed-resistant cover. For faster results, mix clover seeds with fast-growing annual ryegrass (it’ll fade after 1–2 years, leaving clover to dominate).
Can I mix clover with grass, or should I go all-clover?
Both work! A 50/50 mix of clover and fine fescue (PNW’s best grass) balances softness and resilience. All-clover lawns are greener, softer, and self-fertilizing but may feel slightly springier underfoot. Start with a mix if you’re unsure—you can always transition to 100% clover later!
Will clover attract bees and other pests?
Great news for pollinators! Clover is a bee magnet, but it’s not a pest problem—bees help your lawn (and your garden) thrive. If you’re concerned, opt for white Dutch clover (less attractive to bees than red) or plant bee-friendly flowers nearby to redirect them. No pesticides needed—clover’s deep roots repel weeds naturally.
Why is my clover lawn turning brown or patchy?
Brown spots? Don’t panic! Clover goes dormant in extreme heat or drought but bounces back with rain. Check for:
- Fungal issues: Improve airflow by mowing higher (3–4 inches).
- Shade stress: Clover needs 4–6 hours of sun daily—thin trees or add a shade-tolerant mix.
- Competing weeds: Hand-pull or smother with cardboard before overseeding.
If it’s consistently struggling, test your soil pH (clover prefers 6.0–7.0).
Pro Tip:
Mow clover high (3–4 inches) to encourage thick growth and shade out weeds. Skip fertilizers—clover fixes its own nitrogen! Just dethatch once a year if the layer gets over ½ inch thick.
Wrapping up and next steps
Transforming your Pacific Northwest lawn into a lush, clover lawn isn’t just possible—it’s a game-changer! 🌿 With the right mix of white Dutch clover and microclover, you’ll enjoy a resilient, eco-friendly yard that thrives in the PNW’s unique climate.
Whether you’re reducing water bills, cutting back on mowing, or embracing a greener lifestyle, this low-maintenance alternative delivers big results.
Ready to take the next step? Start small—test a patch in your yard or consult local experts to tailor the mix to your soil and sunlight. Soon, you’ll be the envy of the neighborhood with a vibrant, sustainable lawn that works with nature, not against it!