
Lawn
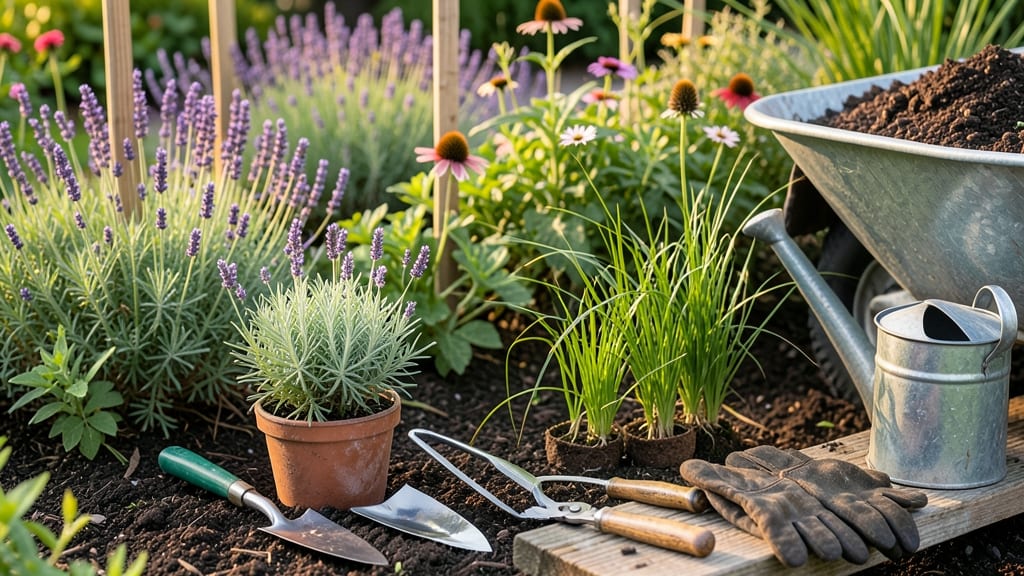
Convert your lawn to a garden—and watch it transform from a water-guzzling green carpet into a thriving, low-maintenance oasis. 🌱 The shift starts with a bold choice: swap grass for plants that feed you, feed pollinators, and feed your soul—while saving time and money. I’ve done this twice now, and the second time was easier because I learned the hard way about soil prep and plant spacing. The payoff? A yard that looks better, works harder, and costs less to maintain.
First, you’ll need basic tools (a shovel, rake, and wheelbarrow) plus soil amendments like compost or aged manure to feed your new garden. Native plants or drought-tolerant perennials are your best friends—they thrive with less water and care than grass ever did.
Sketch a rough layout before digging: group plants by water needs, add paths for easy access, and leave room for future expansion. The key is starting small—even a 4x8-foot bed makes a difference—and letting it grow with you.
By the end of the first season, you’ll have a garden that’s lush, low-maintenance, and alive with color. No more mowing, no more chemical treatments, just the quiet hum of bees and the occasional harvest of fresh herbs or veggies.
The soil will improve year after year, and your yard will become a sanctuary instead of a chore. It’s not just about what you grow—it’s about how you live in your space.
Ready to dive in? We’ll cover the step-by-step process, from smothering grass to planting your first bed, plus how to keep it thriving with minimal effort. Even if you’re a beginner, this is doable—just take it one square foot at a time.
📚 In This Guide
- What you need
- Instructions
- Tips and common mistakes
- Wrapping up and next steps
What you need
- ● Soil Testing Kit – Check pH and nutrient levels (1 kit covers 10-20 tests).
- ● Topsoil or Compost – 2-4 cubic yards (depending on lawn size; ~2" depth). Opt for organic compost for nutrient-rich soil.
- ● Mulch – 4-6 bags (2-3 cubic feet each) for weed suppression and moisture retention.
- ● Native Plants or Perennials – 10-20 plants (quantity varies by design; drought-resistant varieties recommended).
- ○ Drip Irrigation System or Hose with Nozzle – For efficient watering (optional but highly recommended for low-maintenance gardens).
- ● Garden Gloves & Knee Pads – Protect your hands and joints (1 pair each).
- ● Shovel & Spade – For digging and soil prep (1 each).
- ● Rake & Hoe – For leveling soil and removing weeds (1 each).
- ● Wheelbarrow – To haul soil, mulch, or plants (1, 3-cubic-foot capacity).
- ● String Line & Stakes – For marking garden beds (50 ft. line + 4 stakes).
- ● Pruners or Shears – For trimming plants (1 pair).
- ● Edging Tool – Creates clean borders between garden and lawn.
- ● Soil Amendments – Like worm castings or bone meal for nutrient boosts.
- ● Garden Hose Timer – Automates watering for hands-free convenience.
- ● Solar-Powered Lights – Adds ambiance and safety after dark.
- ● Compost Bin – Turns yard waste into free fertilizer over time!
Step-by-step instructions for converting your lawn to a low-maintenance garden
Here’s how to turn your grassy space into a thriving, easy-care garden in just a few focused steps.
🪴 Step 1: Plan Your Garden Layout and Remove Grass
Start by sketching your design on paper, marking where plants, paths, and features like raised beds or seating will go. I like to use a grid system—measure your yard and divide it into sections based on sun exposure and plant groupings. This keeps maintenance simple later.
Next, remove the grass. The easiest method is to smother it with 6-12 sheets of thick cardboard or landscape fabric (no plastic—it traps moisture and causes rot). Secure the edges with rocks or soil, then water thoroughly. In 4-6 weeks, the grass beneath will decompose enough to till into the soil. If you’re impatient, rent a sod cutter for a quicker removal—just rent a 12-inch blade for clean cuts.
Here’s the thing—don’t rush this step. If grass roots remain, they’ll compete with your new plants for water and nutrients. I’ve seen gardens fail because homeowners skimped here. Take your time to get it right.
☀️ Step 2: Test Soil and Amend for Plant Health
Before adding anything, grab a soil test kit from your local extension office or garden center. This tells you exactly what your soil needs—whether it’s nitrogen, phosphorus, potassium, or pH adjustments. Most lawn soils are too acidic or compacted, so I always amend mine with 2-3 inches of compost (work it into the top 6 inches of soil).
For heavy clay soil, mix in sand or perlite to improve drainage—clumps of clay repel water, and roots can’t penetrate. If your soil is sandy, add peat moss or coconut coir to retain moisture. You’ll know you’ve done this right when the soil feels crumbly and holds moisture without feeling soggy.
Don’t skip the compost—it’s the foundation of a low-maintenance garden. I’ve seen gardens thrive for years with just this one step done properly.
🌱 Step 3: Install Mulch and Plant Low-Maintenance Species
Spread 3-4 inches of organic mulch (like wood chips or straw) over the soil to suppress weeds and retain moisture. This is where low-maintenance plants shine—choose native perennials, drought-tolerant ground covers, and ornamental grasses. These plants spread easily, require little water once established, and attract pollinators.
For 4 servings (a typical small garden), I recommend 10-15 plants total, spaced 12-18 inches apart. Group plants with similar water needs together—this makes irrigation a breeze. Water deeply after planting to settle the soil around roots, then let the mulch do the work of keeping moisture in.
Watch for new growth within 2-3 weeks—that’s your signal the plants have taken root. If you see wilting, water again, but resist the urge to overwater. Most low-maintenance plants prefer dry spells over soggy soil.
✂️ Step 4: Establish Irrigation and Maintenance Routine
Set up a drip irrigation system or soaker hoses for deep, slow watering that reaches roots without wasting water. Run it for 15-20 minutes, 2-3 times per week, adjusting based on rainfall. You’ll know it’s working when the soil stays evenly moist 2 inches below the surface but never waterlogged.
Once plants are established (after 6-8 weeks), reduce watering to once a week or when the mulch looks dry. Weeds will pop up—pull them when they’re small, before they compete with your plants. A 10-minute weekly weeding session keeps things manageable.
Real talk: The first year is the hardest. After that, your garden will need almost no work—just occasional mulch top-ups and deadheading spent blooms. That’s the beauty of a low-maintenance oasis.
Tips & tricks for perfect low-maintenance garden conversion
Transforming your lawn into a garden doesn't have to be overwhelming—these practical tips will help you avoid common pitfalls and create a space that thrives with minimal effort.
Design Matters: When sketching your garden layout in Step 1, include paths that are at least 2-3 feet wide—this makes weeding and maintenance much easier. I like to draw my design to scale on graph paper, using each square to represent 1 foot of space. This helps visualize plant spacing and ensures you don't overcrowd your new garden. Trust me, this small step prevents headaches later when plants compete for resources.
Grass Removal Hack: For Step 1, if you're using cardboard to smother grass, choose double-thick boxes (like appliance boxes) rather than thin cereal boxes. This creates a thicker barrier that blocks more light and speeds up decomposition. After laying the cardboard, water it thoroughly—this helps the edges stay secure and prevents wind from lifting the sheets. The 4-6 week decomposition time is non-negotiable, but you can speed things up by adding a thin layer of compost on top of the cardboard before planting.
Soil Test Timing: In Step 2, don't wait to test your soil—most extension offices process tests in 1-2 weeks. I always send mine in right after sketching my design so I have results before I start amending. If you're in a hurry, you can do a basic at-home test for pH (under $10) while waiting for the full report. Most lawn soils need compost regardless, but knowing your exact needs helps you target amendments more precisely. For example, if your soil is sandy, focus on adding organic matter to improve water retention.
Plant Selection Strategy: When choosing low-maintenance plants in Step 3, group them by height and water needs. Place taller plants (like ornamental grasses) toward the back and shorter perennials (like lavender or sedum) toward the front. This creates natural layers that reduce maintenance. I also recommend including 3-5 pollinator-friendly plants—they'll attract bees and butterflies while requiring minimal care. Native plants are your best bet as they're already adapted to your local climate and soil conditions.
Pro Tips for Convert Lawn To Garden
- Transforming your lawn into a garden doesn't have to be overwhelming—these practical tips will help you avoid common pitfalls and create a space that thrives with minimal effort.
- Design Matters: When sketching your garden layout in Step 1, include paths that are at least 2-3 feet wide—this makes weeding and maintenance much easier.
- Grass Removal Hack: For Step 1, if you're using cardboard to smother grass, choose double-thick boxes (like appliance boxes) rather than thin cereal boxes.
Frequently asked questions
Got questions about converting your lawn to a garden? You’re not alone! Here are some of the most common concerns—and their answers—to help you plan with confidence.
How long does it take to fully convert a lawn to a garden?
Most projects take 3 to 6 months to complete, depending on the size of your yard and the types of plants you’re adding. Smaller beds or native plants may establish faster (2–3 months), while larger landscapes or raised beds could take longer. Start with a phased approach if needed!
Is converting a lawn to a garden more expensive than keeping a lawn?
Costs vary, but a garden can be cheaper long-term. Initial expenses (soil prep, plants, mulch) may run $1,000–$5,000 for a 500 sq. ft. area, but you’ll save on mowing, fertilizers, and water bills. Drought-tolerant plants and mulch further cut costs. Budget-friendly tips can help!
What’s the easiest low-maintenance garden to start with?
Opt for native perennials, ground covers, or succulents—they thrive with minimal water and care. Examples:
- Lavender (drought-resistant, fragrant)
- Creeping thyme (hardy, pest-resistant)
- Sedum (succulent, low-water)
- Ornamental grasses (textural, wildlife-friendly)
What’s the biggest mistake people make when converting a lawn?
Skipping soil testing or proper prep! Many assume their lawn soil is garden-ready, but compacted or nutrient-poor soil can stunt plants. Test your soil ($15–$20) and amend with compost or organic matter. Also, avoid overcrowding plants—give them space to grow!
Will converting my lawn attract pests or rodents?
Not if you plan wisely! Diverse plantings (mixing flowers, herbs, and shrubs) deter pests naturally. Avoid overwatering or leaving debris, which can attract rodents. Marigolds, basil, and mint are great pest-repellents. If issues arise, introduce beneficial insects (like ladybugs) or use organic sprays.
Wrapping up and next steps
Transforming your lawn into a thriving, low-maintenance garden is a rewarding project that enhances your outdoor space—and your peace of mind! 🌿 By choosing the right plants, optimizing water efficiency, and embracing mulch or ground covers, you’ll create a vibrant oasis that’s easier to care for than a traditional lawn.
Start small if needed, but trust the process: every seed planted is a step toward a greener, happier yard.
Ready to begin? Pick one section of your lawn this weekend, gather your supplies, and take the first step. Your future self—and the local pollinators—will thank you! 🐝✨