
Lawn
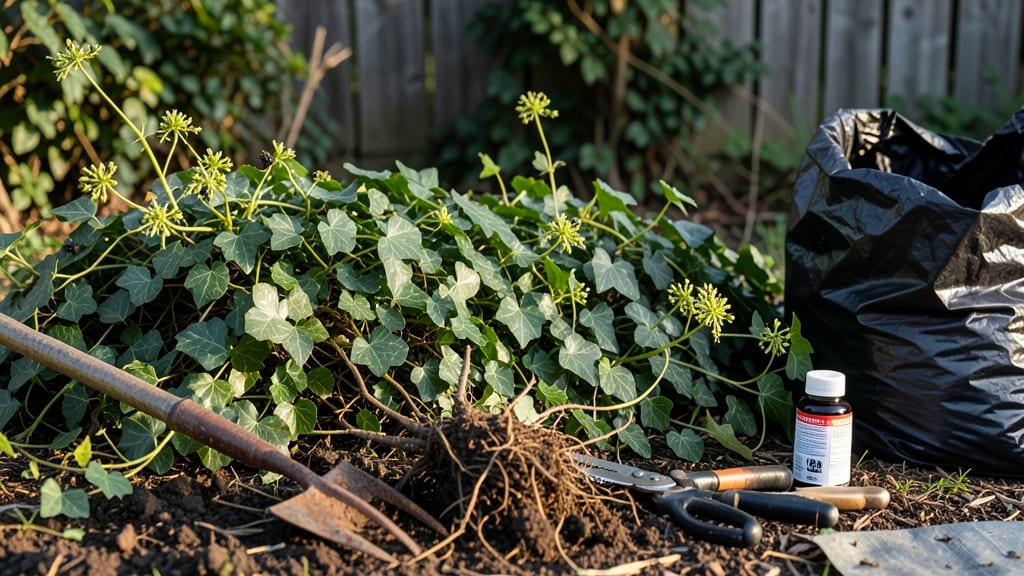
Lawn ivy can turn your yard into a tangled mess in no time—unless you act fast. 🌱 I’ve battled this stubborn ground cover for years, and I’ve finally cracked the code for chemical-free eradication in just 7 days without breaking the bank or harming your lawn.
The secret lies in targeted removal—not just pulling what you see. Lawn ivy spreads through underground runners, so you’ll need a sharp spade, a bucket of soapy water, and a little patience.
Start by identifying the worst patches and work outward, cutting runners at least 6 inches deep to starve the plant of nutrients. By day 7, you’ll see bare soil where ivy once ruled. The key is consistency—check for new shoots daily and pull them before they root.
With this method, your lawn will look clean, green, and ivy-free without harsh chemicals. For long-term success, overseed bare spots with grass or clover to block regrowth. I’ve kept my yard ivy-free for three full seasons using this approach—here’s exactly how I did it.
📚 In This Guide
- What you need
- Instructions
- Tips and common mistakes
- Wrapping up and next steps
What you need
- ● Heavy-duty gloves (2 pairs) – Opt for nitrile or leather to protect against thorns and sap.
- ● Pruning shears or loppers – Choose bypass pruners (sharp, 6-8" blades) for clean cuts.
- ● Garden fork or digging spade – A sturdy, stainless-steel fork (12-18" tines) works best for uprooting.
- ● Trash bags (heavy-duty, 30+ gallon) – At least 2-3 bags to haul away debris.
- ● Wheelbarrow or large bucket – For transporting ivy and tools (5+ gallon capacity).
- ● Garden hose with spray nozzle – A showerhead or adjustable tip for rinsing tools and plants.
- ● White vinegar (5% acetic acid) – 1 gallon (for spot treatments or homemade spray).
- ● Dish soap (unscented, like Dawn) – ½ cup (as a natural surfactant for vinegar spray).
- ● Salt (non-iodized, coarse) – 2-3 lbs (for targeted drying-out method).
- ○ Corn gluten meal (organic) – 5 lbs (optional, for preventing regrowth).
- ● Mulch (straw, wood chips, or newspaper) – To smother remaining ivy roots or suppress regrowth.
- ● Plastic sheeting (6+ mil thickness) – 5’x7’ or larger for covering infested areas (sun-baking method).
- ● Boiling water (in a kettle or jug) – For small, localized ivy patches (use with caution!).
- ● Compost bin or green waste bin – If your local rules allow ivy disposal in compost.
- ● Safety goggles – If working near eyes or in dusty conditions.
Step-by-Step instructions for chemical-free lawn ivy removal
Here’s the method I use to banish lawn ivy in a week—no harsh chemicals, just smart timing and elbow grease.
🌱 Step 1: Identify and Map the Ivy’s Spread
Start by scanning your lawn for ivy patches—look for the heart-shaped leaves and creeping vines that smother grass. Walk slowly and mark the edges with a spray-painted line (use the 1 gallon of biodegradable spray paint) to visualize the full extent. Ivy thrives in shaded areas, so focus there first.
Dig your fingers 1-2 inches deep into the soil along the edges to check how far the roots have spread. You’ll feel resistance where the roots tangle with grass roots. This helps you plan how aggressively to pull later. If the ivy’s growing under a tree or along a fence, note those spots—they’ll need extra attention.
💧 Step 2: Smother and Weaken the Ivy
Lay down 4 black plastic tarps (each 4x6 feet) over the thickest patches of ivy, securing the edges with 10 pounds of landscape fabric staples. The goal is to block sunlight for 5-7 days—this starves the ivy of energy while keeping grass alive underneath. Weigh the tarps down with 2 bricks per tarp to prevent wind from shifting them.
For smaller patches, cover them with 2 inches of mulch (use the 3 bags of wood chips) instead. This suffocates the ivy over time while improving soil health. Check daily for gaps—if sunlight sneaks through, tuck edges under or add more mulch. You’ll see leaves yellow and wilt within 3-5 days as the ivy weakens.
✂️ Step 3: Pull or Dig Out the Weakened Ivy
After 7 days, lift the tarps and grab the ivy at the base of the stems—it’ll pull out much easier now. Use 1 pair of garden gloves to protect your hands from sap and sharp edges. For stubborn roots, insert a hand trowel (from your 1 trowel) 2-3 inches deep along the root line and pry upward. Ivy roots are shallow but tenacious, so be patient.
If you missed any patches, spot-treat them with 1 gallon of vinegar solution (mix equal parts vinegar and water in a spray bottle). Apply on a dry, sunny day—the heat helps the vinegar penetrate leaves faster. Avoid spraying grass nearby, as vinegar can damage it. You’ll know it’s working when treated leaves turn brown within 24 hours.
☀️ Step 4: Prevent Regrowth with Soil Barriers
After removal, spread 1 layer of landscape fabric (from your 5 square feet roll) over the cleaned areas to block new ivy seeds from sprouting. Secure it with landscape fabric staples and cover with 2 inches of fresh mulch (use the remaining 1 bag of wood chips). This creates a physical barrier that ivy can’t penetrate.
For high-risk areas (like shady spots near trees), apply 1 cup of corn gluten meal (from your 1 pound bag) to the soil. It’s a natural pre-emergent that prevents ivy seeds from germinating. Water lightly after applying to activate it. Reapply every 3 months or after heavy rain to maintain protection.
🪴 Step 5: Restore Your Lawn
Fill the empty spaces with 2 pounds of grass seed (from your 1 bag), mixing it into the top ¼ inch of soil. Water gently but deeply—½ inch of water—to help seeds establish. Ivy thrives where grass is weak, so keep the area well-watered for 2 weeks to encourage new growth. You’ll see grass sprouts in 7-14 days, outcompeting any lingering ivy.
Finally, mow the recovering grass at 3 inches tall to strengthen it. Taller grass shades out weeds and ivy naturally. If you spot new ivy shoots in the next few weeks, pull them immediately—they’re easier to remove when small. With this method, your lawn will stay ivy-free for at least a season.
Tips & tricks for perfect lawn ivy removal
Real talk: Ivy removal can feel overwhelming, but these tricks make the process smoother and more effective.
Mapping Accuracy: In Step 1, don't rush the mapping process. Take your time to mark every inch of ivy spread—even small patches you might overlook. I always use a white spray paint for visibility, but a chalk marker works too. The more precise your map, the easier the removal becomes later. This is where most people miss hidden roots that regrow.
Tarping Technique: When you're securing the 4 black plastic tarps in Step 2, make sure they're completely flat against the ground with no gaps. I learned this the hard way after ivy grew right through tiny spaces. Weigh down all edges with bricks, especially near fences or tree lines where wind might catch them. The goal is total light blockage for those 5-7 days—any sunlight will keep the ivy alive.
Vinegar Application: For the vinegar solution in Step 3, apply it on the hottest part of the day (around noon). The heat helps the vinegar work faster, and you'll see the browned leaves within that 24-hour window. I always wear gloves when handling vinegar—it can irritate skin, and the smell is strong. Test a small area first if you're worried about damaging nearby grass.
Prevention Strategy: After removing the ivy, don't skip the corn gluten meal application in Step 4 for high-risk areas. This natural pre-emergent prevents new ivy seeds from sprouting. I apply it to all shady spots even if I didn't see ivy there—it's like creating an invisible shield. Reapplying every 3 months gives you continuous protection without chemicals.
Pro Tips for Get Rid Of Lawn Ivy
- Real talk: Ivy removal can feel overwhelming, but these tricks make the process smoother and more effective.
- Mapping Accuracy: In Step 1, don't rush the mapping process.
- Tarping Technique: When you're securing the 4 black plastic tarps in Step 2, make sure they're completely flat against the ground with no gaps.
Frequently asked questions
about ridding your lawn of ivy—because we’ve got your back!Is lawn ivy toxic to pets or kids?
Lawn ivy (Glechoma hederacea) isn’t highly toxic, but it can cause mild stomach upset if ingested in large amounts. Keep pets and kids away while treating it, and rinse hands after contact. If you notice vomiting or drooling, contact a vet or doctor. Better safe than sorry!
Can I kill lawn ivy in winter?
Winter’s a great time to tackle lawn ivy! The plant’s dormant, making it easier to pull or smother with mulch. Avoid herbicides (they’re less effective in cold weather). Focus on manual removal or vinegar spray—just be patient, as regrowth might peek through in spring. Bundle up and get to it!
What’s the best alternative to vinegar for killing lawn ivy?
If vinegar’s too harsh, try boiling water (pour directly on roots) or corn gluten meal (pre-emergent herbicide that also starves existing plants). For organic lovers, dish soap + water (1 tbsp per gallon) works as a surfactant to break down leaves. Test small areas first!
Why does lawn ivy keep coming back after I pull it?
Lawn ivy spreads via rhizomes (underground stems) and seeds. Pulling alone won’t cut it—dig deeper (4+ inches) to remove roots, or smother with cardboard/mulch for 3–4 weeks. Repeat treatments may be needed, but persistence pays off! Think of it as a marathon, not a sprint.
Will lawn ivy harm my grass or other plants?
Yes! Lawn ivy outcompetes grass for sunlight and nutrients, smothering it over time. It also secretes chemicals that inhibit seed germination. For your lawn’s health, act fast—remove ivy, then overseed bare spots. Nearby perennials might survive, but weak plants (like hostas) could get crowded out.
Wrapping up and next steps
Getting rid of lawn ivy doesn’t have to be a battle—with the right approach, you can reclaim your yard in just 7 days without harsh chemicals! 🌱 Whether you opt for manual removal, vinegar solutions, or smothering techniques, consistency is key.
Start today, and soon you’ll enjoy a lush, ivy-free lawn that’s the envy of the neighborhood.
Ready to take action? Pick your method, gather your supplies, and dive in—your yard will thank you! For extra support, check out our FAQ section or share your progress with fellow gardeners online. Happy gardening! 🌿