
Lawn
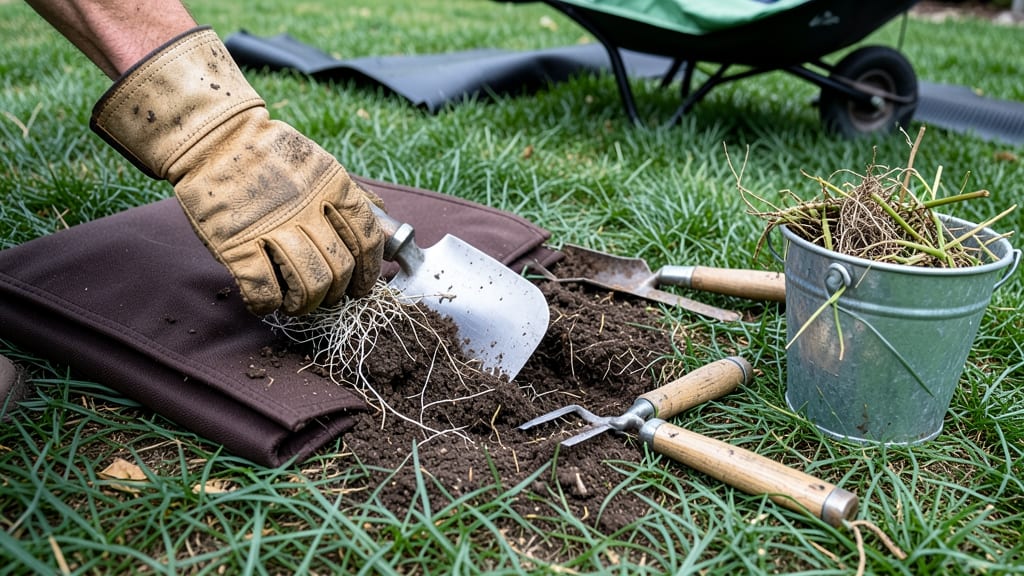
Removing lawn by hand means reclaiming your yard without chemicals or heavy machinery. ✨ I've done this twice—once for a small patio and once for a full sunbaked corner—and both times, the sod came up easier than I expected when I worked in sections and used the right tools.
The key is planning: mark your sections, gather a sharp spade, a sturdy shovel, and a tarp for the grass. For small patches, you can do it in a few hours; for full yards, break it into 2-3 days.
Work when the soil is moist (after rain or watering) to make the sod lift cleanly without tearing.
By the end of 48 hours, you'll have grass-free ground ready for mulch, plants, or a new garden bed. The soil stays intact, and you avoid the mess of chemical runoff. Plus, you can compost the sod—just let it dry out first to prevent mold.
This method works for any yard size, though larger areas require more elbow grease. The payoff? A yard that feels lighter, healthier, and finally tailored to what you actually want to grow. Let's get started!
📚 In This Guide
- What you need
- Instructions
- Tips and common mistakes
- Wrapping up and next steps
What you need
- ● Heavy-duty gloves – 2 pairs (waterproof, long-cuffed, like blank">Mechanix or Filon for grip and protection)
- ● Knee pads or a small kneeling pad – 1-2 (to protect your joints during long sessions)
- ● Garden fork or dandelion digger – 1 (long-handled, sturdy, like the blank">Fiskars Steel Dandelion)
- ● Pruners or hand shears – 1 pair (for trimming stubborn roots or weeds)
- ● Shovel or spade – 1 (round-point or flat-edged, blank">like this 12-inch model)
- ● Wheelbarrow or large tarp – 1 (for hauling grass clippings and debris)
- ● Garden rake – 1 (bendable-tine for loosening soil and removing small roots)
- ● Buckets (5-gallon) – 2-3 (for soaking tools or collecting grass)
- ● Hose with spray nozzle – 1 (for wetting soil before digging)
- ● Heavy-duty trash bags – 10-20 (30-50 gallon size for bulk removal)
- ○ Mulch or landscape fabric – Optional but helpful (if prepping for new ground cover)
- ● Sun hat and sunglasses – 1 each (for long, sunny days)
- ● Portable saw (for thick roots) – 1 (like a blank">Fiskars X7)
- ● Work boots with ankle support – 1 pair (if working on uneven terrain)
- ● Knee sleeves or compression gear – 1 set (for extra joint support)
- ● Garden hose attachment (pressure nozzle) – 1 (for rinsing tools quickly)
- ● Workout band or resistance bands – 1 (to stretch and warm up before digging)
Step-by-Step instructions for hand-lawn removal
Here's how to clear grass without chemicals—just elbow grease and patience.
🪴 Step 1: Gather Your Tools and Prep the Area
Start with a sturdy garden fork or transplant spade to loosen soil and a sharp shovel for clean cuts. Wear gloves—grass roots and soil get messy. Clear debris like leaves and sticks first; they'll slow you down. I like to work in small sections, about 2 feet by 2 feet, to avoid exhaustion.
Mark your progress with a garden hose or string line to create neat borders. This keeps you from overworking one spot and helps visualize how much you've accomplished. If the grass is thick, water the area lightly the day before—damp soil pulls up easier than dry.
✂️ Step 2: Cut and Remove Grass in Sections
Use your shovel to slice through the grass just below the soil line, about ½ inch deep. Angle the blade slightly to avoid gouging the ground. I work in straight lines, then pivot to cut perpendicular strips—this makes removal easier. Lift the sod carefully and place it on a tarp or directly in your compost bin (if it’s weed-free).
Don’t worry about perfect edges—this isn’t landscaping. Focus on speed and consistency. If you hit rocks or roots, adjust your cut and move on. The goal is to expose the bare soil underneath, not create a flawless surface. Work in 10-15 minute bursts to avoid sore muscles; your arms will thank you later.
🌱 Step 3: Loosen and Rake the Soil
Once the grass is gone, use your garden fork to poke holes 2-3 inches deep across the entire area. This aerates the soil and helps new plants or ground cover establish roots. Space the holes about 6 inches apart in a grid pattern. If the soil is compacted, add a thin layer of compost or topsoil (about ½ inch deep) to improve drainage and fertility.
Rake the area smooth with a stiff-bristled rake, removing any remaining grass roots or debris. Pay extra attention to edges where grass might creep back. A quick sweep with a leaf blower helps too—it’s faster than raking and clears fine particles. Now’s the time to decide what’s going next: mulch, plants, or bare soil for a new project.
💧 Step 4: Prevent Regrowth and Protect Your Work
Grass seeds and roots can survive for weeks, so cover the area immediately with cardboard or thick layers of newspaper (remove tape/staples first) to block sunlight. Secure it with rocks or mulch to keep it in place. Water lightly to help the paper settle into the soil. Within 2-4 weeks, the grass underneath will die, and you’ll have a clean slate.
For extra insurance, apply a thin layer of mulch (2-3 inches) after the paper decomposes. This smothers any lingering grass and prepares the bed for planting. Check weekly for sprouts—pull them by hand as soon as they appear. Patience is key here; the more thorough you are now, the less maintenance later.
Tips & tricks for perfect hand-lawn removal
These practical tricks will make your grass-free project go smoother—saving you time, effort, and frustration.
Tool Selection: A sharp shovel is your best friend here. Dull blades tear grass instead of cutting cleanly, which makes removal harder and leaves behind more roots. I sharpen mine with a file before starting—it makes all the difference when cutting through thick sod. For stubborn patches, try a transplant spade; its narrower blade gets into tight spaces better than a broad shovel.
Work Smart, Not Hard: In Step 2, when you're cutting grass in sections, I recommend working in 10-15 minute bursts with short breaks. Your arms will thank you later—this method prevents fatigue while keeping momentum. Also, always cut perpendicular to your first pass. This creates a grid pattern that makes lifting sod easier, especially in thick grass areas. Think of it like peeling wallpaper: you want clean edges to avoid tearing.
Soil Prep Pro Tip: After removing grass in Step 3, if your soil feels compacted, don't skip the compost layer. Even just ½ inch of compost improves drainage and fertility dramatically. I like to mix in a handful of vermiculite (optional) for extra aeration if I'm planting right away. This step is especially important if you're planning to grow vegetables later—they need loose, well-draining soil to thrive.
Regrowth Prevention: For the cardboard/newspaper barrier in Step 4, overlap sheets by at least 2 inches to prevent sunlight from sneaking through. I've learned the hard way that even small gaps can lead to grass sprouting. Secure the edges with rocks or mulch, and check weekly for any new growth. If you spot sprouts, pull them immediately—they're easier to remove when young than when established.
Pro Tips for Remove Lawn By Hand
- These practical tricks will make your grass-free project go smoother—saving you time, effort, and frustration.
- Tool Selection: A sharp shovel is your best friend here.
- Work Smart, Not Hard: In Step 2, when you're cutting grass in sections, I recommend working in 10-15 minute bursts with short breaks.
Frequently asked questions
Got questions about removing lawn by hand? You’re not alone! Here are some of the most common concerns—and straightforward answers—to help you tackle this project with confidence.
How long does it really take to remove a lawn by hand?
For a small lawn (under 500 sq. ft.), expect 2–4 hours of active work, spread over a weekend. Larger areas may take 2–3 days if you’re working solo. Break it into sections to avoid fatigue—think of it like weeding a giant garden bed! Timing also depends on grass type (e.g., Bermuda grows back faster than fescue).
Do I need special tools, or can I use basic gardening supplies?
You can start with hand tools like a digging fork, pry bar, and heavy-duty gloves, but a lawn scraper or transplant spade speeds up the process. Renting a sod cutter (for thick grass) or borrowing a matric mat (to suppress regrowth) can save time. Skip the chemicals—this method is all about elbow grease and patience!
What’s the best time of year to remove lawn by hand?
Aim for early spring or fall when soil is softer and grass is less aggressive. Avoid peak summer heat (grass roots are deep and tough) and winter (frozen ground makes digging a chore). If you’re in a warm climate, late afternoon sessions help prevent overheating. Pro tip: Water the lawn 24 hours before to loosen roots!
Will the grass grow back if I don’t treat the soil afterward?
Yes! Grass roots are sneaky—even small fragments left behind can sprout. After removal, smother the area with cardboard or a thick layer of mulch, then cover with landscape fabric or plant ground covers (like clover or creeping thyme). For long-term results, consider solarization (clear plastic sheets in summer) or planting deep-rooted alternatives.
Is removing lawn by hand worth the effort compared to chemicals?
if you prioritize eco-friendliness, long-term savings, and customization. Chemicals kill everything (including soil microbes) and often require repeat applications. Hand removal lets you repurpose soil, avoid runoff, and design a low-maintenance landscape. Plus, it’s a great workout! Just budget time—your back (and patience) will thank you for the break.
What do I do if I hit rocks or roots while digging?
Don’t panic! Use a rock bar or pry tool to gently lift rocks out (save them for pathways!). For stubborn roots, cut them with loppers or a shovel—leave a 1-inch stub to prevent regrowth. If roots are deep (like from a tree), focus on removing the top 4–6 inches of soil. Think of it as archaeology for your yard!
Wrapping up and next steps
Removing lawn by hand is totally doable—no chemicals, no heavy machinery, just elbow grease and patience! By following these steps, you’ll transform that patchy grass into a thriving, low-maintenance landscape in just two days.
Whether you’re prepping for a garden, wildflower meadow, or a cozy ground cover, you’ve got this!
Now that you’re ready to roll up your sleeves, take it one section at a time. Start small—tackle one area, celebrate your progress, and soon, you’ll be sipping lemonade in your brand-new grass-free oasis. Happy digging! 🌱✨