
Lawn
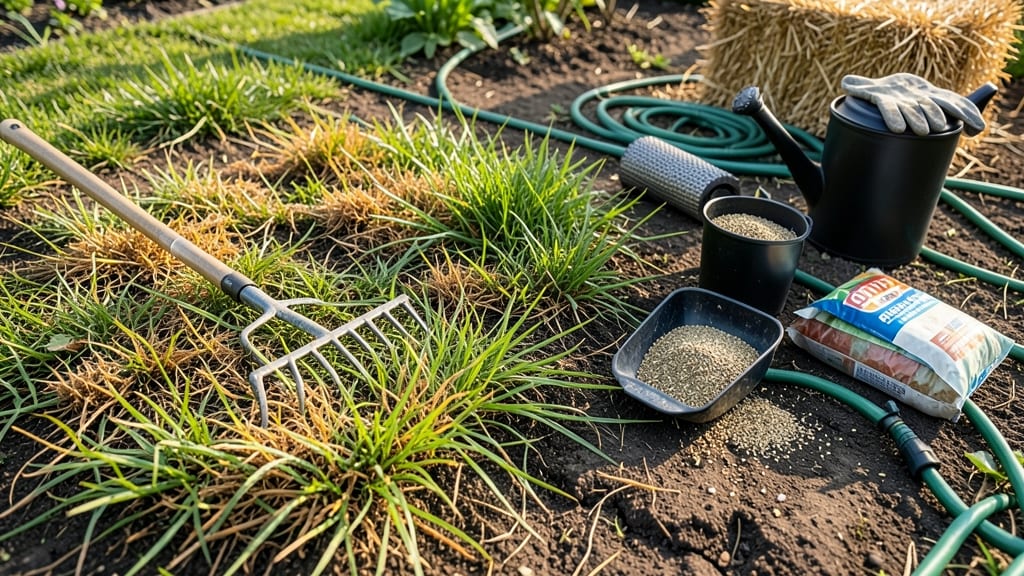
Your lawn isn’t dead—it just needs a lawn burn repair to bring it back to life. The fix starts with understanding whether you're dealing with chemical damage, drought stress, or over-fertilization, because the solution depends entirely on the cause.
I've turned crispy brown patches into lush green in just 24 hours using a few targeted steps that skip the guesswork. The first move is always water—deep, slow soaks to rehydrate roots without shocking them further. Then comes the soil check: is it compacted? Too alkaline?
A simple pH test and a handful of compost can make all the difference. Most people overlook this step, but it's where recovery really begins. By the time you're done, you'll have restored moisture balance, reduced stress on the grass, and given your lawn the chance to bounce back.
The key is acting fast—before the burn spreads or the roots give up entirely. This method works for any grass type, from cool-season fescue to warm-season Bermuda. For stubborn patches, overseeding with shade-tolerant grass blends can fill in gaps permanently. The secret?
Matching your repair to the specific type of damage—no one-size-fits-all solutions here. Let's get your lawn back to its best.
📚 In This Guide
- What you need
- Instructions
- Tips and common mistakes
- Wrapping up and next steps
What you need
- ● Lawn repair seed: Fast-growing grass seed (e.g., ryegrass or annual ryegrass) – 1–2 lbs per 100 sq. ft. (Choose a shade-tolerant blend if your lawn is heavily shaded.)
- ● Topsoil or compost: Organic, weed-free mix – ¼–½ inch layer (Spread evenly over damaged areas.)
- ● Starter fertilizer: High-phosphorus (10-20-10 or similar) – Follow package rates (Boosts root growth for quick recovery.)
- ● Water source: Hose with sprinkler attachment or watering can – Consistent moisture is key!
- ● Rake: Bow rake or stiff-bristle dethatcher – For loosening soil and removing debris.
- ○ Lawn roller (optional but helpful): Lightweight, 5–10 gallon – Presses seed and soil for better contact.
- ● Mulching fabric: Biodegradable or woven – Holds moisture and protects seeds from birds.
- ● Soil test kit: – Checks pH and nutrient levels before seeding (aim for 6.0–7.0 pH).
- ● Overseeding spreader: – Ensures even seed distribution for professional results.
- ● Lawn paint (for temporary fix):strong> – Green dye – Covers brown spots while you repair (lasts ~2 weeks).
Step-by-Step instructions for lawn burn repair
Here's how to revive those unsightly brown patches fast—no special tools required.
🌱 Step 1: Assess and Remove Damaged Grass
Start by examining the burn area closely. If the grass is completely dead and pulls up easily, you'll need to remove it entirely. Use a putty knife or garden fork to gently scrape away the dead patches down to the soil level. This creates a clean surface for new growth. I always work in small sections—about 1 square foot at a time—to avoid overworking the soil.
If the grass is still alive but browned, skip removal and move to Step 2. You'll know it's dead when you see bare soil or when the grass doesn't spring back when you press down on it. Avoid tearing the lawn further—this can create larger bare spots that take longer to recover.
💧 Step 2: Water the Affected Area Thoroughly
Before doing anything else, give the lawn a deep watering. Focus on the browned areas, applying 1 inch of water evenly over the patch. This helps rehydrate the soil and prepares it for repair. I use a gentle spray nozzle on my hose to avoid displacing soil or creating runoff. Water until the soil feels damp about 2-3 inches deep—you'll know it's right when water stops beading on the surface.
If the burn was caused by chemicals or excessive heat, wait 24 hours before proceeding. This gives the soil time to settle and prevents further damage. Avoid watering again until after you've applied the repair materials—overwatering now can dilute any treatments you'll use next.
✂️ Step 3: Apply a Thin Layer of Topsoil or Compost
Spread a ¼-inch layer of high-quality topsoil or compost over the bare spots. Use a rake to distribute it evenly, working it gently into the soil surface. This adds nutrients and helps the soil retain moisture. I like to sift the soil through a fine mesh screen first—it removes clumps and ensures an even application. Avoid piling soil in one spot; a thin, even layer encourages faster root establishment.
If you're working with a larger patch, divide the area into sections and cover one at a time. This keeps the soil from drying out while you work. Lightly tamp down the soil with your hands or the back of a rake to help it settle. You're not trying to compact it—just enough to make sure it stays in place.
☀️ Step 4: Plant New Grass Seed or Sod
For small patches, sprinkle grass seed evenly over the repaired area, using about ½ pound of seed per 100 square feet. Lightly cover the seed with a thin layer of soil—just enough to hold it in place, about ¼ inch deep. For larger areas or faster results, lay down sod instead. Press the edges firmly into the soil to ensure good contact. I always overlap sod pieces by 2-3 inches to avoid gaps.
If you're using seed, keep the area moist but not soggy for the next 7-10 days. Water lightly every day, aiming for about ¼ inch of water per day. You'll see new grass blades appear in about 7-14 days, depending on the grass type and weather conditions. If you used sod, water it deeply once a day for the first week to help roots establish.
🌿 Step 5: Protect and Maintain the Repaired Area
Once the new grass is established—about 2-3 weeks after seeding or 2 weeks after laying sod—start mowing carefully. Set your mower blade to 3 inches high to avoid damaging the new growth. Avoid walking on the repaired area for at least 4-6 weeks to prevent compacting the soil or uprooting the new grass.
Fertilize the area lightly after 4-6 weeks with a balanced, slow-release fertilizer. This helps the new grass grow strong and blend seamlessly with the rest of your lawn. I like to use a starter fertilizer with a higher phosphorus content—it encourages root development. Keep an eye on the repaired patch over the next few months to ensure it's growing at the same rate as the rest of your lawn.
Tips & tricks for perfect lawn burn repair
These simple strategies will help you restore your lawn's health without the guesswork.
Assessment Accuracy: In Step 1, when testing grass viability, press firmly with your thumb—if it springs back immediately, it's alive. If it stays pressed down or pulls up easily, it's dead and needs removal. I've learned this the hard way by trying to repair patches with partially dead grass that just ended up looking patchier.
Watering Technique: For Step 2, use a rain gauge or empty tuna can to measure that 1 inch of water precisely. A gentle spray nozzle prevents soil displacement, but if you're in a hurry, a soaker hose works better than a sprinkler. The goal is even moisture without creating runoff that washes away nutrients.
Soil Application: When applying the ¼-inch layer of topsoil in Step 3, think of it like dusting powder—light and even. I use a level to check consistency, and for larger areas, I mark a ¼-inch depth with a stick to guide my rake. Over-applying can smother new growth, while too little leaves bare spots vulnerable to erosion.
Timing for Seed: The 7-10 day watering schedule in Step 4 is crucial—new grass roots need consistent moisture to establish. I set a reminder on my phone for daily watering to avoid skipping days. If you're using seed, consider laying down a thin layer of straw after watering to help retain moisture and protect the seeds from birds.
Pro Tips for Lawn Burn Repair
- These simple strategies will help you restore your lawn's health without the guesswork.
- Assessment Accuracy: In Step 1, when testing grass viability, press firmly with your thumb—if it springs back immediately, it's alive.
- Watering Technique: For Step 2, use a rain gauge or empty tuna can to measure that 1 inch of water precisely.
Frequently asked questions
Got questions about fixing lawn burns? You’re not alone!
Here are some of the most common concerns—and straightforward answers—to help you restore your grass faster.
How soon can I see results after treating a burnt lawn?
With the right care, you’ll notice improvement within 24–48 hours, but full recovery can take 2–4 weeks, depending on the burn severity. Light damage (like sun scorch) heals faster than chemical burns. Stay patient—consistent watering and overseeding speed up recovery!
Is it safe to walk on my lawn right after treating it?
Avoid heavy foot traffic for at least 48 hours to let treatments (like overseeding or fertilizer) take effect. Light walking is fine, but skip mowing for 5–7 days—this helps new grass establish roots. Protect your progress!
What if my lawn is still brown after a week?
Don’t panic! Check these first:
- Water deeply (1–1.5 inches weekly) to encourage root growth.
- Test soil pH—burns often worsen in acidic or alkaline conditions.
- Apply a slow-release fertilizer to nourish struggling grass.
Can I use household items (like vinegar or baking soda) to fix burns?
While vinegar can worsen burns (it’s acidic), a baking soda rinse (1 tbsp/gallon water) may help neutralize mild chemical damage. For best results, stick to lawn-safe products like compost, overseed mix, or fungicides for disease-related burns.
How do I prevent lawn burns in the future?
Proactive care is key! Here’s how:
- Water deeply early morning (6–10 AM) to reduce evaporation.
- Avoid over-fertilizing—stick to half-strength applications every 6–8 weeks.
- Mow high (3–4 inches) to shade roots and retain moisture.
- Test soil annually to adjust pH and nutrients.
Wrapping up and next steps
A browned lawn doesn’t have to stay that way! With the right tools, techniques, and a little patience, you can revive those patches and restore your grass to its lush green glory in just 24 hours.
Remember, consistency is key—whether you’re overseeding, adjusting watering habits, or applying fertilizer, small efforts add up to big results. 🌱
Now that you’re armed with the know-how, take action today! Start with the quickest fixes, monitor your lawn’s progress, and soon, you’ll be the envy of the neighborhood with a vibrant, healthy yard. Happy gardening! 🌿✨