
Lawn
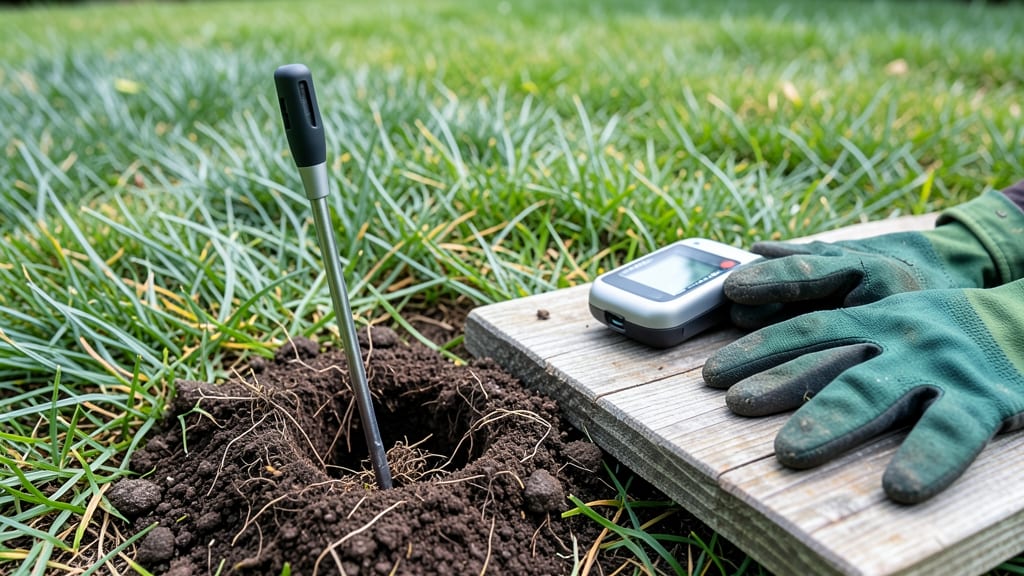
A lawn pH meter reveals the hidden secret behind your grass's struggles—because even the most beautiful lawns fail when soil chemistry is off. 🌱 I used mine last spring after years of patchy growth, and within minutes, I knew exactly why my Kentucky bluegrass was fighting me: the soil was too acidic.
The meter doesn't just give you a number—it tells you why your lawn looks sad, and more importantly, how to fix it.
Testing is simpler than you think: just insert the probe into moist soil, wait 30 seconds, and read the pH. A reading below 6.0 means your grass is starving for nutrients, while above 7.5 locks out essential minerals. My meter even came with a color chart—no science degree needed.
The key is testing multiple spots, since pH varies across your yard, and taking notes on where the brown patches appear. Once you know your pH, fixing it is straightforward. For acidic soil (below 6.5), sprinkle lime—I use pelletized for even distribution.
For alkaline soil (above 7.0), sulfur or peat moss works best. My lawn went from 5.8 to 6.8 in two months, and the difference was night and day: vibrant green instead of yellowing blades, and roots that finally dug deep. The best part?
You don't need to guess anymore. This tool turns lawn care from a guessing game into a foolproof system. Even my neighbor's "perfect" lawn had a pH problem—his meter reading was 7.2, and he's been adding sulfur ever since. The proof is in the grass!
📚 In This Guide
- What you need
- Instructions
- Tips and common mistakes
- Wrapping up and next steps
What you need
- ● Ready to test your lawn’s pH like a pro? Here’s everything you’ll need to get started—no guesswork, just great results! 🌱⚡
- ● Pro tip: 💡 If your meter requires calibration, check the manual—some need it before every use! Store your meter in a cool, dry place to extend its life. ⏳
Step-by-Step instructions for using a lawn pH meter
Here’s how to get crystal-clear soil pH readings every time—no guesswork, just perfect results.
🌱 Step 1: Collect Soil Samples from Multiple Spots
Grab your trowel and dig 4-6 small holes across your lawn, about 3-4 inches deep. Space them 10-15 feet apart—this ensures you’re testing the whole area, not just one patch. I like to zigzag across the yard for accuracy. Avoid spots near sidewalks or driveways, where soil might be compacted or altered.
Use the trowel to scoop out ½ cup of soil from each hole, then mix all samples together in a clean bucket. This composite sample gives you a true average of your lawn’s pH. If your yard has shady vs. sunny areas, test them separately—their pH might differ. Break up any clumps with your fingers and remove rocks or debris.
💧 Step 2: Prepare the Soil for Testing
Moisten the mixed soil slightly with distilled water—just enough to make it damp like a wrung-out sponge. Tap water can skew readings because of minerals, so distilled is best. I fill a spray bottle with distilled water and mist until the soil feels uniformly damp but not soggy. Overwatering here will dilute the sample and throw off your meter’s accuracy.
Let the soil sit for 10-15 minutes to settle. This gives any excess moisture time to absorb evenly. Stir gently once more to ensure consistency. If the soil feels dry again after sitting, add a tiny bit more distilled water—just a few spritzes. The goal is even moisture, not saturation. Now’s also the time to check your meter’s batteries—nothing worse than a dead battery mid-test.
✂️ Step 3: Calibrate and Test the Soil
Follow your meter’s instructions to calibrate it—usually, this means dipping the probe into pH 7.0 solution (included with most meters) for 30 seconds. The reading should stabilize at 7.0; if not, recalibrate or check the probe for damage. Once calibrated, gently press the probe into the prepared soil, 1-2 inches deep, and hold it steady for 60 seconds.
Watch the display for a stable number—it might flicker at first. If it jumps between 6.5 and 7.2, take another reading after stirring the soil again. For best results, test 3-4 times in the same sample and average the numbers. Write down the reading immediately; soil pH can shift slightly as it dries. If your meter has a temperature compensation feature, use it—soil temp affects accuracy.
☀️ Step 4: Interpret Results and Plan Adjustments
Compare your reading to the ideal range for your grass type: most cool-season grasses (like fescue or bluegrass) thrive at 6.0-7.0, while warm-season grasses (like Bermuda or Zoysia) prefer 6.0-6.5. If your pH is below 6.0, your lawn needs lime to raise it; if it’s above 7.5, sulfur will lower it. I keep a log of my readings—last year, my front yard tested at 5.8, and after adding lime, my grass went from patchy to lush in 6 weeks.
Don’t panic if your pH is off—small adjustments take time. For example, a pH of 5.5 might only need 5-10 pounds of lime per 1,000 sq. ft. Spread it evenly, water lightly, and retest in 2-3 months. If your soil is very acidic (below 5.0), you’ll need to retest more frequently until you hit the sweet spot. Pro tip: Test in spring or fall when soil is most active—summer readings can be misleading due to heat stress.
Tips & tricks for perfect soil pH testing
These precision-focused tips will help you get accurate, repeatable readings every single time—no more guessing games with your lawn's health.
Sampling Strategy: When collecting your 4-6 small holes in Step 1, focus on the areas where you notice the most variation in grass color or growth. I learned this the hard way after testing only the greenest patch—it gave me a false "perfect" reading while the rest of my lawn was struggling. For large yards, consider dividing into zones (front, back, sunny vs. shady) and test each separately. This targeted approach reveals hidden issues your general test might miss.
Moisture Consistency: The 10-15 minute settling time in Step 2 is your secret weapon for accuracy. I used to rush this step, but I've found that's when readings get skewed. After adding distilled water, gently press the soil between your fingers—it should hold together when squeezed but not crumble. If it feels like damp sand, you need just a few more spritzes. Pro tip: Use a kitchen scale for precision—aim for about 25-30% moisture content by weight for optimal readings.
Reading Stability: In Step 3, when your meter flickers between 6.5 and 7.2, don't panic! This happens because soil pH isn't perfectly uniform. Stir the sample again and take another 60-second reading. For the most accurate average, I recommend testing 5 times in different spots of the same sample rather than just 3-4. Write down each reading and calculate the average—this smooths out any local variations in your soil composition.
Seasonal Timing: The instructions mention testing in spring or fall, and I couldn't agree more. But here's what nobody tells you—morning is the best time to test. Soil temperatures are cooler and more stable, which means your meter readings will be more consistent. If you must test in summer, do it in the early morning before the sun heats up the soil. I've seen readings vary by 0.5 points between morning and afternoon tests in the same spot during peak summer!
Pro Tips for Lawn Ph Meter
- These precision-focused tips will help you get accurate, repeatable readings every single time—no more guessing games with your lawn's health.
- Sampling Strategy: When collecting your 4-6 small holes in Step 1, focus on the areas where you notice the most variation in grass color or growth.
- Moisture Consistency: The 10-15 minute settling time in Step 2 is your secret weapon for accuracy.
Frequently asked questions
Got questions about using a lawn pH meter? You’re not alone! Here are some of the most common concerns—plus clear, actionable answers to help you get the most out of your soil test.
How often should I test my lawn’s pH with a meter?
For most lawns, testing once a year (spring or fall) is ideal. If you’re dealing with new sod, poor growth, or recent soil amendments, check every 3–6 months. Soil pH shifts over time due to weather, foot traffic, and organic matter breakdown—so consistency is key!
Do I need to water my lawn before using a pH meter?
Nope! In fact, dry soil is better for accurate readings. Watering right before testing can dilute the sample or introduce errors. Test when the top 1–2 inches of soil are dry but not bone-dry—think of it like damp sand at the beach. Pro tip: Test after a light rain if your soil is unusually parched.
Can I use a pH meter on clay or sandy soil?
A lawn pH meter works for all soil types, but clay and sandy soils may require extra prep. For clay: Break up clumps and test multiple spots (pH can vary). For sandy soil: Moisten slightly to help electrodes make better contact. Calibrate your meter first—especially if you’re switching between soil types.
Why is my pH meter giving inconsistent readings?
Inconsistent readings often stem from poor calibration, dirty electrodes, or uneven soil samples. Troubleshoot by:
- Rinsing electrodes with distilled water and recalibrating (use pH 4.0 and 7.0 buffers).
- Testing in multiple spots—soil pH isn’t uniform!
- Ensuring soil is loose and representative (avoid thatch or surface debris).
- Storing your meter properly (electrodes should stay moist in a storage solution).
Is a pH meter worth it, or should I just use lime/fertilizer guesswork?
Short answer: Yes, it’s worth it! A meter gives you real-time data to avoid over- or under-treating your lawn. Guessing with lime or sulfur can waste money, harm soil microbes, or even burn your grass. For under $20, a meter pays for itself in fewer amendments and healthier turf. Think of it as your lawn’s “checkup”!
Wrapping up and next steps
Mastering your lawn’s pH balance doesn’t have to be a guessing game—with a lawn pH meter, you’re now armed with the precision tool to cultivate lush, healthy grass. 🌱 From testing to adjusting, every step you’ve learned ensures your soil is primed for peak performance, saving time and resources while boosting curb appeal.
Ready to take the next step? Start small: test one section of your lawn this week, then expand your efforts. Before you know it, your yard will be the envy of the neighborhood—one pH level at a time!