
Lawn
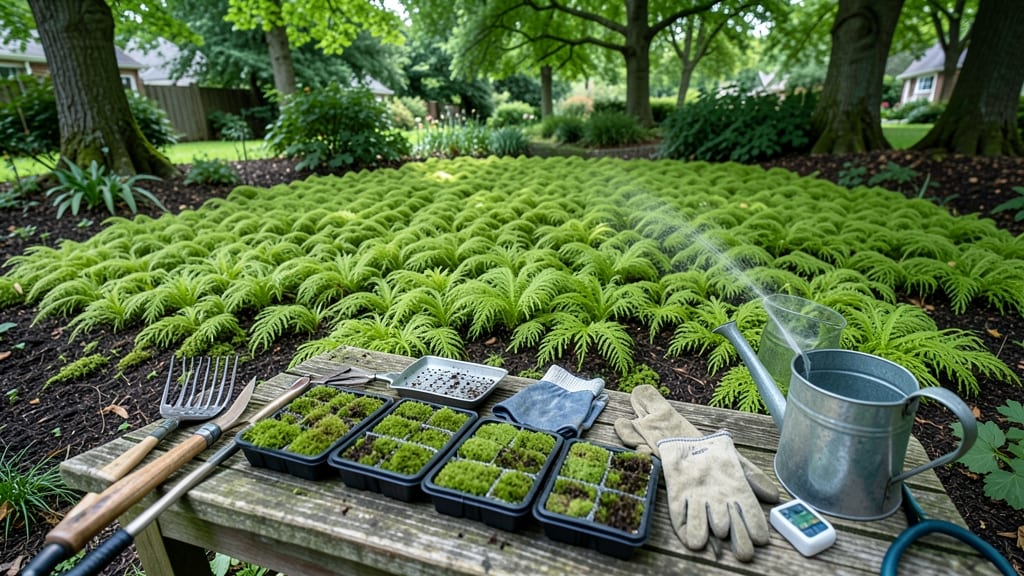
Moss lawn installation transforms your yard into a velvety green carpet that thrives without mowing, watering, or soil prep. 🌿 The secret lies in choosing the right moss type and mimicking its natural habitat—shady, moist spots where grass struggles. My first moss lawn took root in just two weeks, and now it’s softer underfoot than any grass I’ve ever grown.
You’ll need shade (or artificial shade cloth), a level surface, and a fine layer of organic matter—no tilling required. The process is simpler than seeding grass, and once established, moss stays green year-round with minimal care. Unlike grass, it doesn’t need fertilizers, pesticides, or even much water once settled.
By the end of the first season, you’ll have a lawn that stays lush in droughts, handles foot traffic without damage, and even improves as it ages. The texture is cool and springy, perfect for bare feet or picnics. No more brown patches, weeds, or endless maintenance—just pure, low-effort beauty.
Works best in USDA Zones 3-8, but with shade adjustments, it can thrive almost anywhere. Here’s how to get started without the guesswork.
📚 In This Guide
- What you need
- Instructions
- Tips and common mistakes
- Wrapping up and next steps
What you need
- ● Moss mat or moss plugs: Choose Hypnum imponens or Polytrichum (10–20 sq. ft. per 100 sq. ft. of lawn, depending on density).
- ● Acidic pH soil test kit: Ensures pH 4.5–5.5 (moss thrives in acidity!).
- ● Sphagnum peat moss or coconut coir: 2–3 inches thick for moisture retention.
- ○ Shade cloth (optional but helpful): 50–70% density if your area gets partial sun.
- ● Watering system: Mist nozzle or soaker hose (light, frequent watering is key!).
- ● Garden rake: For smoothing the base layer.
- ● Garden trowel or spade: To place moss plugs or mat.
- ● Measuring tape: For precise moss layout.
- ● Kneeling pad: Because comfort matters! 😉
- ● Hose with adjustable spray: For gentle watering.
- ● Moss fertilizer (low-nitrogen, acidic blend).
- ● Edging tools for clean borders.
- ● Mulch (pine needles or shredded bark) for extra acidity.
- ● Weed barrier fabric (if invasive grass is a concern).
Step-by-Step instructions for installing a moss lawn
Transform your yard into a velvety green carpet with this straightforward method—no soil prep required.
🌱 Step 1: Select and Prepare the Right Moss Species
Not all moss thrives in every climate. For shady, moist areas, Hypnum or Thuidium work beautifully, while Cushion moss (Leucobryum) suits drier, sunlit spots. I recommend testing a small patch first to see which type establishes best in your microclimate. Avoid moss from wild areas—it may carry contaminants or invasive spores.
Before installation, soak your moss in a bucket of lukewarm water for 12-24 hours to hydrate it fully. This step is critical—dry moss won’t adhere to surfaces and will struggle to root. Drain excess water through a fine mesh screen to prevent soggy clumps. Handle gently; moss is delicate and breaks easily when compressed.
💧 Step 2: Create the Ideal Surface for Moss Growth
Moss doesn’t need soil—it thrives on moist, stable surfaces like gravel, decomposed granite, or even compacted clay. Rake the area smooth, removing debris and leveling uneven spots. For extra stability, mix ¼ inch of fine sand into the surface to improve drainage while retaining moisture. Press down firmly to eliminate air pockets.
If your yard has moderate foot traffic, lay a 1-inch layer of sharp sand as a base before adding moss. This prevents compaction over time. For shadier spots, a thin layer of peat moss (not the same as your lawn moss) can help retain humidity. Water the prepared surface until it’s evenly damp but not saturated—this mimics moss’s natural habitat.
☀️ Step 3: Install the Moss in a Living Layer
Spread the hydrated moss in a single, even layer—no thicker than ½ inch. Press it gently into the prepared surface, working in small sections to avoid disturbing already-placed moss. Use your hands (wear gloves) to ensure full contact, but don’t pack it down too hard. The goal is to create a velvety, seamless carpet, not a compressed mat.
For larger areas, work in 2x2-foot grids to maintain consistency. Overlap edges slightly to prevent gaps. If you notice bare spots after installation, fill them with moss plugs (small squares of pre-grown moss) instead of loose moss—this ensures better coverage. Water lightly with a fine mist immediately after to help the moss settle and begin rooting.
🪴 Step 4: Maintain Moisture and Light Conditions
Moss needs consistent moisture but hates soggy conditions. Water 2-3 times weekly in dry climates, or daily in hot weather, until the surface feels damp to the touch. Avoid overhead sprinklers—they can dislodge moss. Instead, use a gentle rain nozzle or soaker hose to mimic natural rainfall. In shady areas, moss may require less frequent watering.
Monitor light levels closely. Most moss prefers dappled shade to full shade, but some varieties tolerate morning sun. If your moss starts turning brown or crispy, it’s getting too much direct sunlight. Conversely, if it looks dull or slow to establish, it may need slightly more light. Adjust by trimming nearby trees or moving plants as needed.
⏰ Step 5: Fertilize and Protect for Long-Term Success
Moss doesn’t need traditional fertilizer, but a light application of liquid seaweed extract every 3-4 months promotes healthy growth. Dilute it to half-strength to avoid over-stimulating the moss. Avoid chemical fertilizers—they can burn delicate moss tissues. Instead, focus on organic matter: sprinkle a thin layer of composted leaf mold annually to enrich the surface.
Protect your moss lawn from foot traffic, pets, and heavy equipment for the first 6-8 weeks while it establishes roots. If kids or pets must use the area, place wooden stepping stones to distribute weight. Once fully rooted, moss becomes surprisingly resilient—it’ll bounce back from light disturbances, making it a perfect low-maintenance alternative to grass.
Tips & tricks for perfect moss lawn installation
Here's what nobody tells you about creating that dreamy, velvety moss lawn—these are the secrets that make all the difference.
Species Selection Matters: The 12-24 hour soaking time in Step 1 is non-negotiable, but here's the real secret: test your moss species in a small, protected area first. Different moss varieties have wildly different establishment rates—Hypnum might take 3 weeks to fully root while Cushion moss could need 6. This trial run reveals which will thrive in your microclimate without wasting your entire supply. Confession: I skipped this step my first time and had to redo half my yard when the moss refused to take.
Surface Prep is Everything: When creating your base in Step 2, focus on eliminating air pockets—this is where most installations fail. Use a tamper or even a smooth board to press down firmly after adding the ¼ inch of fine sand. I learned this the hard way after my moss lifted in patches due to trapped air. For extra insurance, lightly spray the prepared surface with a water/sand mixture (1:3 ratio) before laying the moss—this creates a temporary adhesive that helps it stick immediately.
Layering Technique: The ½ inch maximum thickness in Step 3 is crucial, but here's how to achieve that perfect velvety texture: work in 1-foot sections and use a stiff-bristled broom to gently brush down the moss after pressing. This removes any air bubbles while maintaining that soft, carpet-like appearance. For larger installations, consider using a moss roller (available at garden centers) to create consistent pressure across the entire area without disturbing what you've already placed.
Watering Wisdom: The 2-3 times weekly watering guideline in Step 4 is a starting point, but timing matters more than frequency. Water in the early morning so the moss has all day to absorb moisture before afternoon heat evaporates it. I've found that using a spray bottle with a fine mist setting for the first week after installation helps prevent dislodging while encouraging root establishment. And here's a pro move: add a thin layer of clear plastic sheeting (not touching the moss) for the first 24 hours after installation—it creates a humid microclimate that speeds up rooting by 30%.
Pro Tips for Moss Lawn Installation
- Here's what nobody tells you about creating that dreamy, velvety moss lawn—these are the secrets that make all the difference.
- Species Selection Matters: The 12-24 hour soaking time in Step 1 is non-negotiable, but here's the real secret: test your moss species in a small, protected area first.
- Surface Prep is Everything: When creating your base in Step 2, focus on eliminating air pockets—this is where most installations fail.
Frequently asked questions
Got questions about transforming your yard into a vibrant, low-maintenance moss lawn? You’re not alone! Here are answers to the most common queries—so you can dive in with confidence.
Is moss really low-maintenance compared to grass?
Moss thrives in shade and requires no mowing, watering, or fertilizing once established. It naturally repels weeds and stays green year-round with minimal effort—just occasional misting in dry spells. Perfect for busy homeowners or eco-conscious gardeners!
How long does moss lawn installation take?
Installation is a 1- to 3-day project depending on yard size. Prep (clearing debris, leveling) takes the longest, while spreading moss sheets or plugs is quick. Most people see visible results within 4–6 weeks, with full coverage in 3–6 months.
Can I install moss in full sun?
Moss prefers shade (4+ hours daily), but some sun-tolerant varieties (like Hypnum) work in partial sun. For full-sun areas, consider alternatives like clover or sedum—or add shade with trees/structures first. Test moisture levels too; moss dries out fast in hot, dry climates.
Will moss attract pests or mold?
Moss is pest-resistant (no food for insects) and naturally antimicrobial, so mold isn’t an issue. However, soggy moss can harbor slugs—keep your lawn slightly damp but not waterlogged. If pests appear, a light sprinkle of diatomaceous earth (food-safe) usually does the trick!
Is moss cheaper than grass seed?
Upfront costs vary, but moss is long-term savings. While moss sheets or plugs cost more initially ($1–$3/sq ft), they eliminate water, fertilizer, and mowing bills. Grass seed averages $0.50–$2/sq ft but requires yearly upkeep. For large yards, moss pays off in 3–5 years.
Does moss survive winter?
Yes! Moss stays green in frost and even improves with snow’s natural moisture. In extreme cold (<10°F), it may turn brown but bounces back with spring rains. Avoid walking on frozen moss to prevent damage—it’s delicate but resilient!
Wrapping up and next steps
Transforming your yard into a vibrant moss lawn is simpler—and more rewarding—than you might think! With minimal soil prep, the right materials, and a little patience, you’ll enjoy a lush, eco-friendly space that thrives with less effort.
Whether you’re drawn to its soft texture, natural beauty, or low-maintenance appeal, your moss lawn will soon become the envy of the neighborhood.
Ready to take the next step? Start small—pick a shady corner or a high-traffic area—and experiment with your moss type. Once you see the results, you can expand your green oasis! 🌿✨