
Lawn
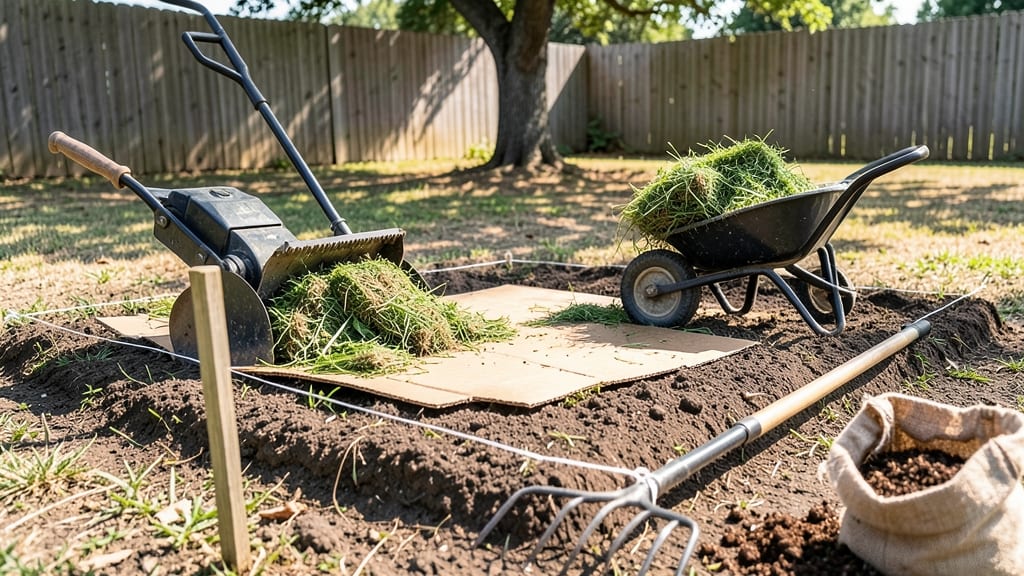
Your boring lawn can become a low-maintenance privacy oasis by removing the lawn for a garden in just 90 days. 🌿 The transformation starts with a simple plan—remove the grass, prep the soil, and plant a mix of tall shrubs, flowering perennials, and ground covers that block views while requiring almost no upkeep.
I swapped my entire backyard lawn for a layered garden that now thrives with minimal watering. The key is choosing plants that love your climate—drought-tolerant grasses, evergreen shrubs, and flowering perennials that spread naturally.
You’ll need basic tools (shovel, tarp, mulch) and a weekend to prep, but the payoff is a lush, private space that needs far less work than a lawn ever did.
Imagine stepping into a garden where fragrant lavender and tall ornamental grasses sway in the breeze, while evergreen shrubs create a living privacy screen. This isn’t just a garden—it’s a retreat that stays green all year with almost no mowing, weeding, or fussing.
The best part? You’ll cut your water bill in half and eliminate the endless cycle of fertilizing and reseeding.
Perfect for small yards, urban backyards, or any space where you’d rather spend time relaxing than fighting weeds. Let’s turn that grass into something that actually works for you—not against you.
📚 In This Guide
- What you need
- Instructions
- Tips and common mistakes
- Wrapping up and next steps
What you need
- ● Safety gear: Work gloves (2 pairs: heavy-duty for digging, lightweight for planting)
- ● Safety goggles (1 pair)
- ○ Knee pads (optional but highly recommended)
- ● Lawn removal: Sharp shovel or spade (1–2, depending on lawn size)
- ● Lawn smothering fabric (black plastic sheeting or landscape fabric, enough to cover the entire area + 1–2 ft overlap)
- ● Stakes & heavy-duty landscape staples (for securing fabric)
- ● String trimmer or edging tool (for clean borders)
- ● Soil prep: Garden fork or broadfork (for aerating soil)
- ● Compost or aged manure (5–10 bags, ~2 cubic feet per 100 sq ft)
- ● Garden hose with spray nozzle (for watering)
- ● Planting: Native perennials/shrubs (quantity based on desired density; consult a local nursery for species suited to your climate)
- ● Mulch (3–4 bags, shredded hardwood or pine straw)
- ○ Organic mulch spreader (optional, for even coverage)
- ● Wheelbarrow (for hauling soil/compost)
- ● Soil test kit (to check pH/nutrient levels before planting)
- ● Post-hole digger (if adding privacy screens or trellises)
- ● Watering timer (for consistent moisture)
- ● Pruners (for shaping plants post-planting)
Step-by-Step guide to transforming your lawn into a low-maintenance privacy garden
Here’s the method I’ve used to convert sunbaked grass into lush, private garden spaces that thrive with minimal effort.
🌱 Step 1: Smother the Lawn and Prepare the Soil
Start by covering the lawn with 6-12 sheets of thick cardboard (no glossy finishes) or black plastic sheeting to block sunlight and kill grass. Overlap edges by 4 inches to prevent light from creeping through. This process takes 4-6 weeks—you’ll know it’s ready when the grass turns brown and the cardboard decomposes slightly. I like to weigh down the edges with rocks to keep them in place during wind.
Once the grass is dead, remove the cardboard or plastic and loosen the soil with a broadfork or garden fork to a depth of 6-8 inches. This aerates compacted soil and encourages root growth. If your soil feels heavy or clay-like, mix in 2-3 inches of compost to improve drainage and fertility. You’ll notice the soil crumble more easily after forking—this is your signal it’s ready for planting.
🪴 Step 2: Design for Privacy and Low Maintenance
Plan your garden layout with tall, fast-growing shrubs (like arborvitae or bamboo) along the perimeter for instant privacy. Space them 3-5 feet apart to allow room for growth. For a softer look, mix in ornamental grasses (such as fountain grass or maiden grass) that add texture without needing frequent trimming. I sketch a rough design on paper first—this helps visualize how plants will fill in over time.
Choose drought-tolerant perennials for the middle layer, such as lavender, Russian sage, or coneflowers. These plants thrive with minimal water once established and return year after year. Avoid annuals unless you’re okay with replanting every season. Think of this as a "plant once, enjoy forever" strategy—low maintenance starts with the right plant choices.
☀️ Step 3: Plant for Year-Round Interest
Start by planting evergreen shrubs (like boxwood or holly) first—they provide structure and privacy immediately. Dig holes twice as wide as the root ball but no deeper, then place the plant in the center. Fill the hole with soil, firming it gently around the roots to eliminate air pockets. Water deeply to settle the soil and encourage root spread.
Next, add perennials and grasses, spacing them according to their mature size. For example, lavender should be planted 12-18 inches apart, while taller grasses like fountain grass can go 2-3 feet apart. Mulch the entire area with 2-3 inches of shredded bark or wood chips to suppress weeds and retain moisture. Avoid piling mulch against plant stems—keep it 2 inches away to prevent rot.
💧 Step 4: Water and Mulch for Long-Term Success
Water deeply 2-3 times per week for the first 4-6 weeks to help roots establish. You’ll know you’re doing it right when water drains through the soil 6 inches deep—stick your finger in to check. After that, reduce watering to once a week or when the top 2 inches of soil feel dry. Overwatering is a common mistake—your goal is moisture, not soggy soil.
Reapply mulch annually in late winter or early spring to maintain its weed-suppressing and moisture-retaining benefits. This is the secret to low maintenance—mulch keeps weeds down, retains moisture, and feeds the soil as it breaks down. You’ll spend less time weeding and more time enjoying your private oasis.
✂️ Step 5: Prune and Maintain for Healthy Growth
Prune evergreen shrubs in late winter or early spring before new growth begins. Cut back overgrown branches to maintain shape and encourage bushier growth. For grasses and perennials, remove dead foliage in early spring to make room for fresh growth. I use clean, sharp pruners to avoid damaging plants—dull blades tear rather than cut cleanly.
Fertilize once in early spring with a slow-release, balanced fertilizer (like 10-10-10) to support healthy growth. Avoid high-nitrogen fertilizers—they encourage leafy growth at the expense of flowers and roots. Your garden should look lush but not leggy. If you see yellowing leaves, it’s often a sign of overwatering or poor drainage, not a nutrient deficiency.
Tips & tricks for a flawless lawn-to-garden transformation
Here's what I wish I knew before tackling my first privacy garden project—these details make all the difference between a patchy mess and a thriving oasis.
Timing Tip for Step 1: Don't rush the 4-6 week smothering process! While it feels like waiting forever, this is when the grass truly dies and the soil begins its transformation. I've seen people skip this and end up with stubborn grass roots that compete with new plants. The brown, crispy grass and slightly decomposed cardboard are your green light to proceed—this is when soil microbes wake up and start breaking down organic matter.
Soil Prep Secret: When you're forking that 6-8 inch depth in Step 1, you're not just loosening soil—you're creating pathways for roots and water. If your soil feels like concrete after forking, it's time to add that 2-3 inches of compost. I've found that clay-heavy soils benefit most from this step, as it prevents waterlogging while still providing nutrients. The goal is soil that crumbles easily between your fingers when moist.
Plant Spacing Strategy: The 3-5 foot spacing for shrubs in Step 2 might seem generous, but trust me—this prevents future crowding and makes maintenance easier. I measured my mature shrubs before planting and added an extra 6 inches to each side. For ornamental grasses, I used their mature width (not height) as my spacing guide—these plants spread more horizontally than you'd expect. This foresight saved me from having to prune back overgrown plants later.
Mulching Mastery: That 2-3 inches of mulch in Step 3 isn't just decoration—it's your weed barrier and moisture regulator. I've learned the hard way that piling mulch against stems causes rot, so always maintain that 2-inch gap. For extra weed suppression, I add a layer of landscape fabric under the mulch in high-weed areas, though this isn't necessary for most privacy gardens. The key is to refresh this mulch annually in late winter when weeds are dormant but before spring growth begins.
Pro Tips for Remove Lawn For Garden
- Here's what I wish I knew before tackling my first privacy garden project—these details make all the difference between a patchy mess and a thriving oasis.
- Timing Tip for Step 1: Don't rush the 4-6 week smothering process!
- Soil Prep Secret: When you're forking that 6-8 inch depth in Step 1, you're not just loosening soil—you're creating pathways for roots and water.
Frequently asked questions
Got questions about transforming your lawn into a lush, low-maintenance garden? You’re not alone! Here are answers to the most common concerns to help you plan with confidence.
What’s the best time of year to remove a lawn for a garden?
Spring or early fall are ideal! Soil is workable, and you avoid extreme heat or frost. If you’re in a mild climate, late winter (before weeds sprout) works too. Avoid summer—dry soil and heat stress plants and you.
Do I need to kill my lawn before planting a garden?
Yes, but it’s not as dramatic as you think. Use a natural herbicide like vinegar + dish soap (for small areas) or smother it with cardboard/newspaper topped with mulch. For large lawns, rent a sod cutter or hire pros—it’s faster and cleaner.
What are the cheapest alternatives to removing a lawn?
Skip the sod cutter! Try these budget-friendly hacks:
- Sheet mulching: Layer cardboard + compost over grass (free if you source materials locally).
- Solarization: Cover lawn with clear plastic for 4–6 weeks (sun does the work!).
- Sheet composting: Pile grass clippings + leaves + manure in a corner to decompose into soil.
Will removing my lawn attract pests or weeds?
Not if you prep right! Start with a thick layer of mulch or compost to block weeds. Use organic pest deterrents like garlic spray or companion planting (e.g., marigolds repel pests). A well-fed soil = healthier plants that resist invaders.
How long until my new garden is fully established?
Most gardens take 3–6 months to look polished, but edible plants (like herbs or greens) may yield in as little as 4–8 weeks. Perennials (e.g., hostas, lavender) take 1–2 years to fill in. Patience pays off—focus on soil health first!
Can I still have privacy without a fence?
Fast-growing plants like bamboo, arborvitae, or tall grasses create natural screens in 1–3 years. For quicker results, mix in evergreens (e.g., boxwood) or install a trellis with climbing roses. Layer plants of different heights for a lush, year-round barrier.
What if my soil is terrible after removing the lawn?
Don’t stress—most lawn soil is fixable! Test your soil (local extension offices offer cheap kits) and amend with:
- Compost (2–3 inches)
- Biochar or worm castings (for nutrients)
- Gypsum (if soil is clay-heavy)
Wrapping up and next steps
Transforming your lawn into a lush, low-maintenance garden isn’t just possible—it’s rewarding! 🌿 By choosing the right plants, prioritizing privacy, and embracing sustainability, you’ll create a serene oasis that thrives with minimal effort. The key? Start small, plan wisely, and let nature do the work.
Ready to dive in? Take the first step today:
- Sketch a rough design of your dream garden.
- Gather your materials (or mark them on your shopping list!).
- Set a timeline—3 months is totally doable with consistent effort!