
Lawn
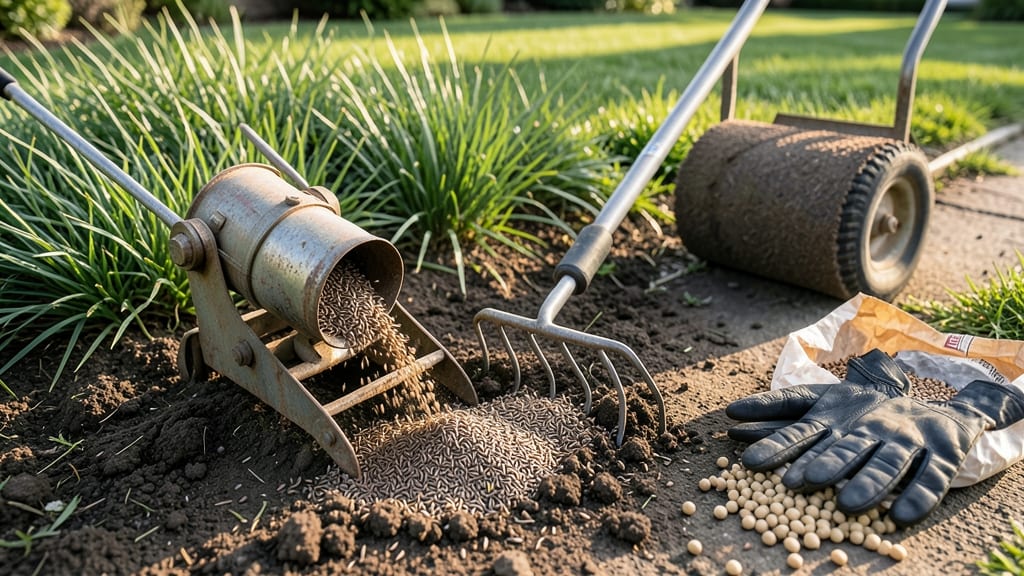
Fall lawn seeding transforms bare patches into lush green by spring. 🌱 The cooler temperatures and consistent rainfall create perfect conditions for seeds to germinate and establish strong roots—something spring seeding just can’t match.
Most gardeners overlook fall because they think it’s too early, but that’s exactly when weeds are dormant and competition is minimal. You’ll see your new grass outgrow weeds naturally, and the roots will develop deep enough to survive winter’s chill.
By late October or early November, your lawn will be ready for winter. The key is proper soil prep, light coverage, and regular watering—just a few weeks of effort now means a thicker, greener lawn all next year. Works in most climates, though southern regions should seed earlier.
Here’s how to make it happen without the common mistakes that kill new grass.
📚 In This Guide
- What you need
- Instructions
- Tips and common mistakes
- Wrapping up and next steps
What you need
- ● Lawn seed: Choose cool-season grass like Kentucky Bluegrass, Tall Fescue, or Perennial Ryegrass (10–20 lbs per 1,000 sq ft, depending on desired density).
- ● Lawn spreader: Broadcast (for large areas) or drop (for precision) – rent or buy a wheel-type spreader for even coverage.
- ● Soil amendment: Compost or a starter fertilizer (10–15 lbs per 1,000 sq ft) to boost nutrients.
- ● Rake: A bow rake (for detaching sod) or stiff-bristle garden rake (for loosening soil).
- ● Water source: Hose with adjustable nozzle or sprinkler (for consistent moisture).
- ○ Optional but helpful: Soil test kit (to check pH/fertility).
- ● Lawn roller (100–150 lbs, for firming seed-to-soil contact).
- ● Epsom salt (for magnesium-deficient soil).
- ● Weather: Seed when daytime temps are 60–75°F (ideal: September–October, depending on your zone).
- ● Soil prep: Mow existing grass short (1–1.5 inches) and remove debris. Loosen soil to ¼-inch depth.
- ● Moisture: Keep soil consistently damp (not soggy) for 14–21 days post-seeding.
Step-by-step guide for fall lawn seeding success
Fall is the perfect time to seed a lawn—here's how to get it right.
🌱 Step 1: Prepare the Soil for Optimal Seed Contact
Start by mowing your lawn as short as possible—about 1 inch tall—to expose the soil surface. This helps seeds make direct contact with the earth, which is critical for germination. Use a stiff-bristled rake to remove any remaining thatch (the spongy layer between soil and grass) and loosen the top ¼ inch of soil. You'll see small clumps of soil break apart easily when raked properly.
If your soil feels hard or compacted, rent a core aerator to create ¼-inch deep holes across the lawn. This improves water and nutrient absorption. After aerating, lightly rake again to smooth the surface. The goal is a fine, crumbly texture where seeds can nestle without being buried too deeply.
💧 Step 2: Spread Seed Evenly for Uniform Germination
Divide your seed into two equal portions and spread the first half in one direction (like sowing a vegetable row). Then spread the second half perpendicular to the first pass to ensure even coverage. Walk slowly and overlap your passes slightly to avoid thin spots. You'll see a light, even layer of seed across the lawn—no clumps or bare patches.
For a 4,000 sq ft lawn, use about 5-6 lbs of seed. Lightly rake the area again to press seeds into the soil without burying them. This ensures good soil contact while keeping them exposed to light. Avoid walking on the seeded area after this step—it disturbs the seeds and creates uneven spots.
☀️ Step 3: Apply Starter Fertilizer and Mulch Lightly
Use a low-nitrogen starter fertilizer (about ½ pound per 1,000 sq ft) to give seeds a gentle nutrient boost without burning tender roots. Spread it evenly with a broadcast spreader, then lightly rake it into the top ¼ inch of soil. This ensures seeds get nutrients without being smothered.
Next, apply a thin layer of straw mulch—about ¼ inch thick—to retain moisture and protect seeds from drying out. Use a drop spreader for even coverage. The mulch should look barely visible from a few feet away. This layer keeps seeds moist while allowing sunlight to reach them, which is essential for germination.
💧 Step 4: Water Gently and Consistently for Germination
Water immediately after seeding to settle the soil and mulch. Use a gentle sprinkler or soaker hose to apply ¼ inch of water evenly. Keep the soil consistently moist—like a damp sponge—until seeds germinate. Water lightly 2-3 times daily for the first 7-10 days, aiming for ¼ inch of water per session. You'll see the mulch stay dark and moist, not soggy.
Once seedlings emerge (about 10-14 days), reduce watering to 1 inch per week, including rainfall. Let the top ½ inch of soil dry slightly between waterings to encourage deep root growth. Avoid heavy water pressure—it washes away seeds or young seedlings. A fine mist setting on your sprinkler works best.
✂️ Step 5: Maintain and Protect New Grass Through Establishment
Wait until new grass reaches 3-4 inches tall before mowing—about 6-8 weeks after seeding. Set your mower blade to 3 inches and never remove more than ⅓ of the blade height at once. This keeps roots strong and prevents stress. You'll see a dense, uniform lawn developing as the grass fills in.
Avoid heavy foot traffic on the new lawn for at least 4-6 weeks. If pets or kids play on it, redirect them to another area. Also, wait until the new grass is well-established (about 3 months) before applying herbicides or heavy fertilizers. This gives roots time to develop and compete with weeds naturally.
Tips & tricks for perfect fall lawn seeding
Fall lawn seeding is all about timing and technique—here's how to avoid the most common mistakes and get that lush, healthy lawn.
Soil Prep is Everything: Don't skip the aeration step if your lawn feels compacted. I've seen too many seeding projects fail because the soil was too hard for seeds to establish roots. After aerating, run your fingers through the soil—it should feel like crumbly cake batter, not packed sand. If you're renting an aerator, do a test run on a small patch first to get comfortable with the depth control.
Seed Spreading Technique: The two-pass method in Step 2 works wonders, but here's the secret: walk in a straight line for each pass. I use a garden hose laid out as a guide to keep my path perfectly straight. This ensures you don't miss spots or double up on seed coverage. For larger lawns, consider using a broadcast spreader for even distribution—just be sure to calibrate it properly for your specific seed type.
Watering Wisdom: Those first 7-10 days of frequent watering are critical, but timing matters just as much as quantity. Water in the early morning (between 4-8 AM) to prevent evaporation and fungal growth. I set up a timer on my sprinkler system to run for 10 minutes every morning and evening during this period—this gives you that perfect ¼ inch of water per session without overdoing it. Keep an eye on the mulch; it should stay dark and moist, not soggy like a swamp.
Protecting New Growth: The no-walk rule in Step 5 is non-negotiable for the first 4-6 weeks. I've had to reseed entire sections where curious pets or kids tracked through too soon. Set up a temporary play area or use a simple rope barrier to keep everyone off the new lawn. For pets, consider using biodegradable lawn markers to remind them where they can and can't go—it's a small investment for a big payoff in your seeding success.
Pro Tips for Seeding Lawns In Fall
- Fall lawn seeding is all about timing and technique—here's how to avoid the most common mistakes and get that lush, healthy lawn.
- Soil Prep is Everything: Don't skip the aeration step if your lawn feels compacted.
- Seed Spreading Technique: The two-pass method in Step 2 works wonders, but here's the secret: walk in a straight line for each pass.
Frequently asked questions
Got questions about seeding your lawn in the fall?
You’re not alone! Here are answers to the most common concerns—so you can tackle your project with confidence.
What’s the best time to seed a lawn in the fall?
Seed in late summer to early fall (typically 4–6 weeks before your first frost) when soil temps are between 60–75°F. This gives grass seeds time to germinate before winter slows growth. Avoid seeding too early (hot soil) or too late (frost risk).
How long does it take for grass seed to grow in fall?
Most cool-season grasses sprout in 7–21 days, depending on variety, moisture, and soil temp. Ryegrass grows fastest (5–10 days), while fescue or bluegrass may take 2–3 weeks. Keep soil consistently moist (not soggy) to speed germination.
Do I need to water differently after seeding?
Yes! Water lightly 2x daily (morning/evening) to keep soil damp (1–2 inches deep). Avoid overhead sprinklers that wash away seed. After germination, taper to 1 inch per week. A spray nozzle or misting attachment works best for new seedlings.
Can I overseed an existing lawn in fall?
Fall is ideal for overseeding because warm soil and cool air reduce stress on your lawn. Mow short (1–1.5 inches), rake to loosen soil, spread seed, and water gently. This fills thin spots and thickens grass naturally. Perfect for Kentucky bluegrass, fescue, or ryegrass mixes.
What if birds or squirrels eat my seed?
Use seed with a bird repellent coating (like Scotts Turf Builder) or cover seed with a thin layer of straw. Scatter cornmeal around the edges—birds prefer it over grass seed. For persistent pests, try a lightweight netting until germination (remove after 2–3 weeks).
Will frost or early snow hurt new grass?
Don’t worry! Established seedlings (with 2–3 inches of growth) can handle light frost. Heavy snow or ice may smother grass, but it’ll bounce back in spring. Avoid seeding too close to winter—aim to finish 4+ weeks before hard frost. Mulch lightly with straw if frost is forecast.
Wrapping up and next steps
Fall is the perfect time to seed your lawn—cool temperatures and gentle rains create ideal conditions for strong root growth and a lush, vibrant yard next spring. 🌱 By following these steps, you’ll set your lawn up for success with minimal upkeep and maximum results.
Now that you’re armed with the right materials, techniques, and answers to common questions, roll up your sleeves and get started! Grab your tools, pick a weekend, and enjoy the satisfaction of a healthier lawn with every step.
Need a little extra motivation? Start small—even a single section can make a difference. Then, expand your efforts over time. Your future self (and your neighbors!) will thank you. 😊