
Fertilization
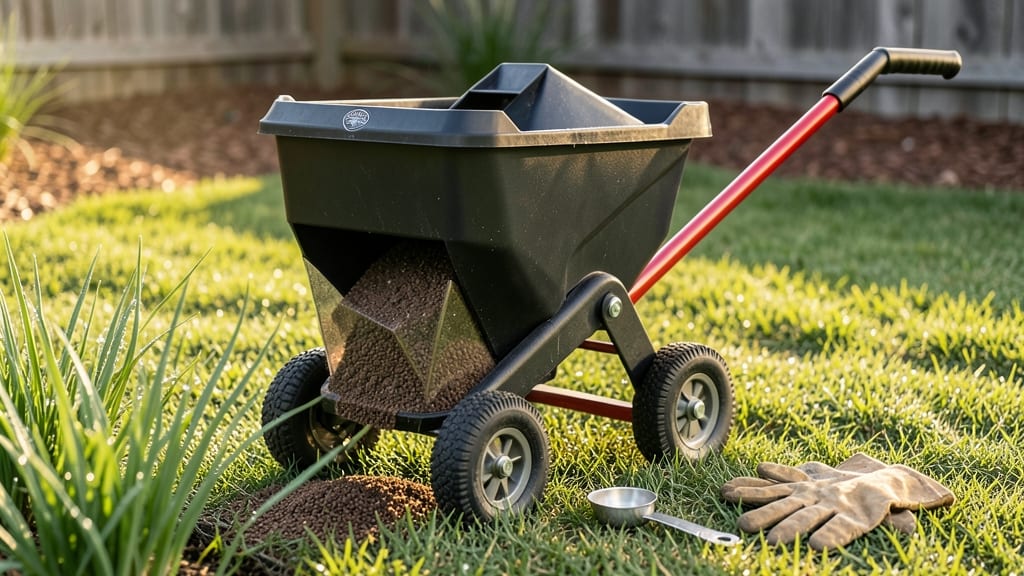
How to use a lawn fertilizer spreader transforms patchy grass into a uniform green carpet—but only if you calibrate it right. ✨ I’ve seen neighbors struggle with streaks and wasted fertilizer, and the fix is simpler than you’d think: adjusting the settings so each square foot gets the same amount. The difference between a healthy lawn and one that looks like a science experiment comes down to these key steps.
Start by measuring your lawn’s square footage and checking the fertilizer’s application rate per 1,000 square feet. Manual spreaders require walking at a steady pace, while self-propelled models let you focus on evenness without exhaustion.
Windier days demand slower speeds to prevent drift, and always wear gloves—fertilizer residue isn’t fun to scrub off later. Most clogs happen when granules bridge in the hopper, so break up clumps before filling.
For streak-free results, overlap your passes by 10 inches and walk in straight lines. Broadcast spreaders work for large areas, while drop spreaders (with adjustable settings) give precision for small lawns.
After spreading, water lightly to help granules settle into the soil. My lawn went from splotchy to velvety green in just two weeks after mastering this method.
Troubleshooting uneven coverage? Check your speed—too fast means missed spots, too slow means over-application. If granules pile up, you’re spreading too densely. For stubborn clogs, a wire hanger works better than brute force. Once you’ve dialed it in, you’ll wonder how you ever lived with an uneven lawn.
📚 In This Guide
- What you need
- Instructions
- Tips and common mistakes
- Wrapping up and next steps
What you need
- ● Lawn fertilizer spreader: Broadcast spreader (for even coverage) OR drop spreader (for precision)
- ● Capacity: 20–50 lbs (adjust based on lawn size)
- ● Fertilizer: Granular lawn fertilizer (check NPK ratio for your grass type)
- ● Quantity: Follow label instructions (typically 10–20 lbs per 1,000 sq ft)
- ● Safety gear: Gloves (nitrile or leather for grip)
- ● Safety glasses (to protect from dust/debris)
- ● Measuring tools: Measuring tape or wheel (to calculate lawn area)
- ● Calibrated scoop or scale (for precise fertilizer dosing)
- ● Water source: Hose with nozzle (for rinsing spreader after use)
- ● Spread rate chart (pre-marked for your spreader model)
- ● Windshield or flags (to mark boundaries on breezy days)
- ● Knee pads (for comfort during long sessions)
- ● Calibration guide (if your spreader lacks one)
- ● Second pair of hands (for loading heavy bags!)
Step-by-Step instructions for using a lawn fertilizer spreader
Mastering even application takes practice, but these steps will help you achieve streak-free, healthy grass every time.
🪴 Step 1: Calibrate the Spreader for Your Lawn Size
Start by measuring your lawn's square footage—this determines how much fertilizer to use per application. Most spreaders have a calibration chart, but if yours doesn’t, test it yourself: spread over a 100-square-foot area and weigh the output. Adjust the settings until you get the correct coverage rate (usually 10-20 pounds per 1,000 sq ft for standard lawns). I always double-check by spreading a small section first—this ensures accuracy before committing to the whole yard.
Fill the spreader hopper with the recommended amount of fertilizer (check the product label for rates). For broadcast spreaders, fill halfway; for drop spreaders, follow the manufacturer’s guidelines. Skipping calibration leads to patchy results—either over-fertilized spots or weak, yellowing grass where nutrients were missed.
☀️ Step 2: Spread in Overlapping Passes for Uniform Coverage
Begin at one corner of the lawn and work in parallel lines, keeping the spreader evenly spaced (usually 6-12 inches apart, depending on the model). Walk at a steady pace—too fast and you’ll miss spots; too slow and you’ll overapply. I like to use a garden hose laid end-to-end as a visual guide for spacing. For large areas, divide the lawn into sections and label them to avoid missing spots or double-applying.
Use the overlap method: after completing one pass, turn around and spread a second pass halfway over the first. This ensures no streaks or bare patches. Drop spreaders let you adjust the flow rate mid-pass, but broadcast spreaders require full coverage per throw—so plan your path carefully. Watch for wind shifts mid-application; if it picks up, pause and adjust your direction.
⏰ Step 3: Adjust Settings for Different Lawn Zones
Most lawns have shady and sunny areas that need different nutrient levels. Use the spreader’s variable-rate settings (if available) to apply half the fertilizer in shaded spots—these areas often get less sunlight and absorb nutrients slower. If your spreader doesn’t have adjustable rates, split the application: spread the full dose on sunny zones first, then reduce the hopper by half for shady patches.
Pay attention to high-traffic areas like walkways or pet zones—they may need extra phosphorus for root strength. After spreading, do a quick visual check: the grass should look evenly dusted with fertilizer, not clumpy or bare. If you see streaks, go back and lightly overlap those sections. Uneven application is the #1 reason for patchy lawn growth.
💧 Step 4: Water Immediately After Spreading
Within 24 hours of applying fertilizer, water the lawn deeply (about 1 inch of water). This activates the nutrients and washes them into the soil where roots can absorb them. Use a soaker hose or sprinkler for even moisture—avoid light misting, which can leave fertilizer on the surface and burn grass blades. I set a timer for 30-45 minutes to ensure full coverage, then check for puddles or dry spots.
Watering too soon (within hours) can cause fertilizer burn, turning grass yellow or brown. Conversely, waiting too long (over 48 hours) lets nutrients dry out and become ineffective. Early morning or late evening watering works best—it reduces evaporation and gives grass time to recover before daytime heat. Watch for dark green patches after watering; these indicate proper nutrient uptake.
✂️ Step 5: Clean and Store the Spreader Properly
After use, empty any remaining fertilizer from the hopper and spreader chute to prevent clumping. Rinse the parts with a garden hose (avoid pressure washers—they can damage plastic components). I wipe down the wheels and handle with a damp cloth to remove residue. Storing the spreader dry and in a shaded area prevents rust and extends its life. For long-term storage, add a silicone spray to moving parts to keep them lubricated.
Check the spreader’s wear and tear before the next use: replace worn-out wheels or cracked hoppers immediately. A well-maintained spreader ensures consistent performance season after season. I label my spreader with the last used fertilizer type and date—this helps me track application schedules and avoid over-fertilizing. Proper storage also deters pests like ants or rodents that might nest in leftover fertilizer.
Tips & tricks for perfect lawn fertilizer application
Between us, these small adjustments can transform your lawn from patchy to picture-perfect. The devil's in the details when it comes to even distribution.
Precision Calibration: That 100-square-foot test area in Step 1 isn't just about getting the right amount—it's about understanding how your specific spreader behaves. I've seen people skip this and end up with either bare patches or grass that looks like it's been dusted with salt. Weigh the output after each adjustment until you're consistently hitting 10-20 pounds per 1,000 sq ft. Pro tip: Mark your spreader settings with a permanent marker so you can replicate them exactly next time.
Visual Spacing Hack: For Step 2's parallel lines, try this: Lay down a garden hose in straight lines 6-12 inches apart before you start spreading. The hose creates a clear visual guide that eliminates guesswork. I've also found that walking at a pace where you can comfortably count "1-2-3" between steps helps maintain that steady rhythm. And if you're working in windy conditions, consider using a wind sock to monitor shifts mid-application.
Zone-Specific Strategy: When adjusting settings for different lawn zones in Step 3, here's what I do: First spread the full dose on sunny areas, then immediately reduce the hopper by half for shady spots. The key is to work quickly between zones to prevent overlap errors. For high-traffic areas, I actually make a note on my lawn map to return with a spot treatment of phosphorus-rich fertilizer later—this gives those areas the extra boost they need without overdoing it on the rest of the lawn.
Watering Window: That 24-hour window in Step 4 is tighter than it sounds. I've learned the hard way that waiting until the next morning (especially in hot climates) can mean the difference between lush grass and fertilizer burn. Set a reminder on your phone for 12 hours after application to ensure you water in time. And when you do water, use the "shoe test"—after 30-45 minutes, if you can't see your shoeprints, you've got even coverage. Dark green patches within 24 hours? That's your sign you've done it right.
Pro Tips for Use A Lawn Fertilizer Spreader
- Between us, these small adjustments can transform your lawn from patchy to picture-perfect. The devil's in the detail...
- Precision Calibration: That 100-square-foot test area in Step 1 isn't just about getting the right amount—it's about ...
- Visual Spacing Hack: For Step 2's parallel lines, try this: Lay down a garden hose in straight lines 6-12 inches apar...
Frequently asked questions
Got questions about using a lawn fertilizer spreader? You’re not alone! Here are some of the most common concerns—and quick, actionable answers to keep your lawn thriving without the guesswork.
What’s the best time of year to fertilize my lawn?
For most grass types, early spring (just as growth resumes) and late summer (before fall dormancy) are ideal. Cool-season grasses (like fescue or bluegrass) also benefit from a light feeding in early fall. Avoid fertilizing in extreme heat or drought—it stresses the grass. Always check your fertilizer’s label for specific timing tips!
Why does my spreader leave streaks or uneven patches?
Streaks usually mean you’re moving too fast or the spreader’s settings are off. Slow down to a walking pace (3–4 mph) and overlap passes by 10 inches. For drop spreaders, adjust the wheel settings; for broadcast spreaders, calibrate the flow rate. Pro tip: Walk in a crisscross pattern (like a “W”) for even coverage.
Can I use a handheld spreader for large lawns, or do I need a walk-behind?
Handheld spreaders work for small areas (<500 sq. ft.), but for anything bigger, a walk-behind spreader saves time and ensures consistency. If you’re renting, consider a broadcast spreader for seed/fertilizer blends—it covers more ground faster. Just calibrate it properly to avoid over- or under-applying!
How often should I clean my spreader between uses?
After every use! Leftover fertilizer can clump or harden, ruining future applications. Rinse the hopper with water, wipe down the wheels/chutes, and store it in a dry place. Bonus tip: Use a vinegar solution (1:3 ratio) to dissolve stubborn residue. Never leave fertilizer in the spreader for weeks—it can corrode metal parts.
What do I do if I accidentally over-fertilize?
Don’t panic! Lightly water the lawn to help dissolve excess nutrients, but avoid overwatering—it can burn roots. If you see yellowing or brown patches, flush the soil with 1–2 inches of water over 24 hours. For severe cases, test your soil’s pH and adjust future applications. Prevention tip: Always measure twice and spread once!
Wrapping up and next steps
Mastering your lawn fertilizer spreader is the secret to a vibrant, healthy lawn—no streaks or uneven patches in sight! 🌱 By following these steps—calibrating your spreader, choosing the right settings, and moving methodically—you’ll achieve a perfectly fed yard every time.
Don’t forget to water afterward to lock in those nutrients and watch your grass thrive.
Now that you’re equipped with the know-how, grab your spreader and get to work! 💪 Your lawn will thank you with lush, green growth in no time. Ready to tackle another project? Check out our guide on seasonal fertilization tips next!