
Lawn
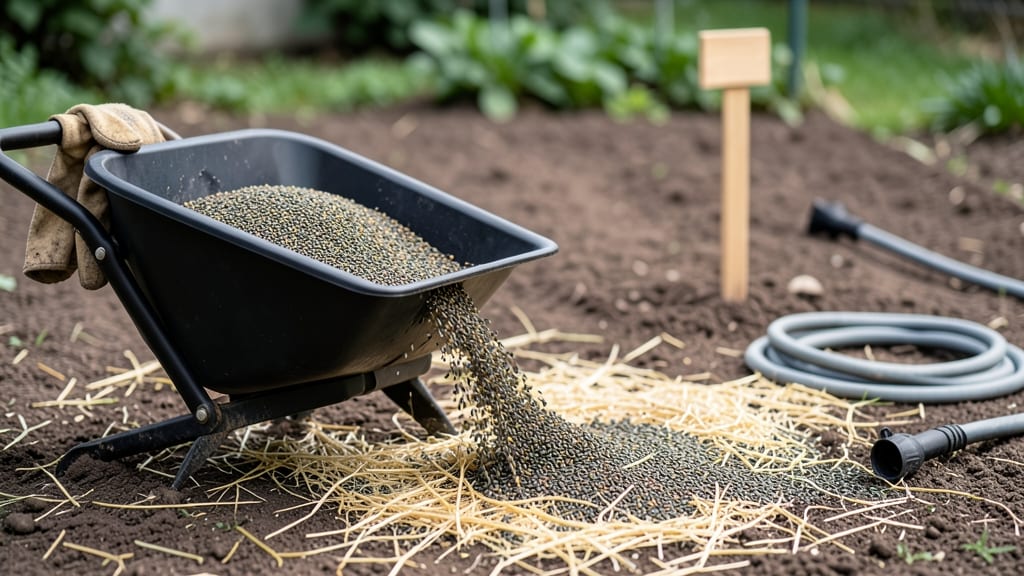
The lawn seed mulch is your secret weapon for protecting newly sown grass—it locks in moisture, shields seeds from drying out, and keeps weeds at bay during those critical first weeks when every drop of water counts. 🌱 I’ve seen seed beds dry out in hours without it, but with the right mulch, germination rates jump from 60% to nearly 90%.
The best materials are lightweight yet protective: straw, peat moss, or even composted leaves. Too much mulch smothers seeds, but a ¼-inch layer is perfect—enough to retain moisture without blocking sunlight. Cool-season grasses like fescue need mulch right after sowing, while warm-season grasses like Bermuda can wait until after germination.
You’ll watch seedlings pop up uniformly instead of patchy, with roots establishing faster and stronger. The mulch also blocks weeds that compete for water and nutrients, giving your grass a fighting chance from day one.
Works for both new lawns and overseeding, and adapts to dry climates (use peat moss) or wet ones (straw prevents rot). Here’s how to do it right—without the guesswork.
📚 In This Guide
- What you need
- Instructions
- Tips and common mistakes
- Wrapping up and next steps
What you need
- ● Lawn seed: Choose a high-quality seed blend suited to your climate and lawn type (e.g., tall fescue, Kentucky bluegrass, or ryegrass). Aim for 5–10 lbs per 1,000 sq ft, depending on the seed mix.
- ● Mulch material: Select one of the following: Straw: Red or wheat straw (avoid dyed or treated varieties). Use 1/4–1/2 inch thick for coverage.
- ● Peat moss: 1–2 inches thick (ideal for moisture retention but less eco-friendly).
- ● Compost: 1/4–1/2 inch layer (adds nutrients but may compact over time).
- ● Water: A hose with a gentle spray nozzle or a watering can (avoid high-pressure streams that dislodge seed).
- ○ Lawn roller (optional but helpful): A lightweight (10–15 lb) roller to press seed and mulch into the soil gently.
- ● Rake: A bow rake or stiff-bristle garden rake to level the soil and remove debris.
- ● Broadcast spreader: For even seed distribution (manual or electric models for larger areas).
- ● Garden gloves: To protect your hands from soil and sharp mulch edges.
- ○ String or stakes (optional): For marking off sections if working in large areas.
- ● Prepare the soil: Loosen the top 1/4–1/2 inch of soil with a rake or tiller to create a seed-friendly bed.
- ● Test soil moisture: Soil should be damp but not soggy (like a wrung-out sponge). Adjust with water if needed.
- ● Choose the right timing: Seed in early spring or fall when temperatures are mild (avoid extreme heat or cold).
Step-by-Step guide to applying lawn seed mulch
Here’s how to keep your new grass moist and protected while it germinates—no guesswork, just reliable results.
🌱 Step 1: Prepare the Soil Before Seeding
Rake the soil surface until it’s smooth and free of debris—this ensures good seed-to-soil contact. You want a fine, even texture so seeds don’t get buried too deep or left exposed. Press down lightly with the back of your rake to create a firm seedbed, which helps prevent erosion when you water later.
Check for large clumps or rocks—remove them now. If your soil feels dry, lightly mist it with water until the top ½ inch is damp but not soggy. This pre-moistening helps the mulch stick better and keeps seeds from drying out during application.
💧 Step 2: Spread Seed Evenly and Lightly
Use a broadcast spreader or hand-sow seeds at the rate recommended on the packet. I like to walk in a grid pattern to avoid overlapping—this ensures even coverage without thick patches. If you’re overseeding, focus on areas where grass is thin or bare.
Gently rake the seeds into the soil with a stiff-bristle rake, covering them with just ¼ inch of soil. This depth keeps them moist while allowing sunlight to reach them for germination. If you bury them deeper, they’ll struggle to break through the surface.
☀️ Step 3: Apply Mulch for Moisture Retention
Choose a straw mulch (not wood fibers or peat moss)—it’s lightweight and breaks down slowly. Spread it evenly over the seeded area, using about ¼ to ½ pound per 100 square feet. The mulch should cover the seeds lightly but not smother them completely.
Work quickly to avoid disturbing the seeds. A light layer keeps soil temperatures stable, reduces evaporation, and prevents wind from blowing seeds away. You’ll see the mulch settle slightly after watering—this is normal and helps maintain consistent moisture.
🌿 Step 4: Water Gently and Consistently
Water immediately after mulching with a fine mist or sprinkler, applying enough to wet the mulch and soil below. Aim for ¼ inch of water daily, keeping the mulch damp but not waterlogged. Overwatering can wash away seeds or mulch, while underwatering leaves them dry.
Check moisture by lifting a corner of the mulch—if the top ½ inch of soil feels dry, it’s time to water again. Avoid heavy foot traffic until you see 50% germination (usually 7-14 days), as this can displace seeds or mulch.
⏰ Step 5: Monitor and Maintain Until Germination
Keep the mulch in place until new grass reaches about 1-2 inches tall. At this stage, you can gradually reduce watering to 2-3 times per week, allowing the soil to dry slightly between sessions. This strengthens root development.
Watch for signs of uneven moisture—darker patches may need extra water, while overly wet spots could signal poor drainage. Once grass is established, remove any remaining mulch to avoid smothering growth. You’ll know you’ve succeeded when the lawn looks lush and uniform, with no bare spots.
Tips & tricks for perfect lawn seed mulch application
Here's what nobody tells you about getting that perfect seed-to-soil balance for germination success.
Soil Prep Secret: In Step 1, take an extra minute to break up any remaining soil clumps with your fingers after raking. Those tiny hidden rocks or hard spots can create air pockets that prevent seed contact with moisture. Think of it like creating a soft, welcoming bed for your seeds—no lumps allowed! The ½-inch dampness check is crucial here: press your finger into the soil; if it springs back slowly, you're good. If it stays indented, add more water.
Seed Distribution Technique: When spreading seeds in Step 2, work in one direction first (say, north to south), then turn and go the opposite direction. This crosshatching method catches any missed spots from your first pass. The ¼-inch coverage is your target—use a ruler if needed to check depth. Too deep and they'll suffocate; too shallow and they'll dry out. I've seen seeds fail because they were buried too deep—don't make that mistake!
Mulch Application Wisdom: For Step 3, use a lightweight straw mulch that you can easily see through. The ¼ to ½ pound per 100 square feet guideline is perfect, but remember: you want to see the seeds through the mulch layer. If you can't see the seeds anymore, you've applied too much. This layer should feel like a cozy blanket—not a suffocating quilt. After watering, you'll notice the mulch settles slightly, which is exactly what you want for even moisture distribution.
Watering Strategy: That ¼ inch daily in Step 4 is your golden rule, but timing matters too. Water in the early morning so the mulch has all day to absorb moisture before evaporation sets in. Use a rain gauge or tuna can to measure your water output—you'd be surprised how much less water you're actually applying than you think. And here's a pro move: after the first watering, check for any mulch that's blown away and gently redistribute it. Every seed needs that protective layer.
Pro Tips for Lawn Seed Mulch
- Here's what nobody tells you about getting that perfect seed-to-soil balance for germination success.
- Soil Prep Secret: In Step 1, take an extra minute to break up any remaining soil clumps with your fingers after raking.
- Seed Distribution Technique: When spreading seeds in Step 2, work in one direction first (say, north to south), then turn and go the opposite direction.
Frequently asked questions
Got questions about lawn seed mulch? You’re not alone—this step can feel tricky at first! Below, we’ve tackled the most common concerns to help you mulch like a pro and keep your new grass thriving.
How long should I keep the mulch on my new lawn?
Leave the mulch in place until the grass reaches about 3–4 inches tall (usually 2–4 weeks). Once the blades are sturdy, you can gently rake off excess mulch to avoid smothering the grass. Pro tip: Check moisture levels—if the soil stays damp without mulch, you can remove it sooner.
Can I overseed my lawn without mulch?
Technically yes, but mulch boosts germination success by 60–80% by locking in moisture and shielding seeds from birds or erosion. If you skip it, water twice daily (early morning and evening) and use a light straw layer (¼ inch) as a bare minimum. Warning: Without mulch, seeds dry out faster in hot or windy conditions!
Will birds or animals eat my lawn seeds?
Birds, squirrels, and even raccoons love fresh seeds. To deter them, cover seeds with mulch immediately after sowing (even a thin layer helps). For extra protection, try bird netting over large areas or sprinkle slaked lime (non-toxic) around the perimeter—animals dislike the taste!
How often should I water after applying mulch?
Keep the mulch and soil consistently moist (like a damp sponge) for the first 14 days. Water lightly but frequently—aim for ¼–½ inch per day—using a gentle sprinkler to avoid displacing seeds. Morning watering is best to reduce evaporation and fungal risks.
Can I reuse mulch from last year’s lawn?
Only if it’s clean, seed-free, and free of weeds. Old mulch may harbor dormant weed seeds or fungal spores. If you’re unsure, compost it first or opt for fresh straw, peat moss, or coconut coir. Bonus: Sterilize reused mulch by baking it in the sun for a few days to kill pathogens.
Should I mulch if I’m seeding in fall or winter?
Yes! A thicker layer (½–¾ inch) works well in cooler months to insulate seeds and retain moisture. Just avoid mulching too early—wait until soil temps drop below 70°F (ideal for fall seeding). In winter, use straw or wood fiber (not peat moss, which breaks down slowly).
| Quick Troubleshooting Guide |
|---|
| Problem: Mulch smells rotten |
| Fix: Fluff the mulch to improve airflow or replace it if it’s waterlogged. |
| Problem: Grass isn’t germinating |
| Fix: Check seed viability, ensure consistent moisture, and test soil pH (ideal: 6.0–7.0). |
| Problem: Mulch washing away |
| Fix: Use a lightweight mulch (like straw) and water gently. Add a starter fertilizer to help seeds anchor. |
Wrapping up and next steps
Using lawn seed mulch is a game-changer for anyone looking to boost germination rates and nurture a lush, healthy lawn. 🌱 Whether you opt for straw, peat moss, or even recycled paper, this simple technique locks in moisture, shields seeds from harsh elements, and sets the stage for vibrant growth.
With the right approach, you’ll see faster, stronger grass taking root—no green thumb required!
Ready to transform your patchy lawn into a thriving oasis? Grab your mulch, follow the steps, and watch your hard work pay off in just a few weeks. Your dream lawn starts with a single seed—and a little protective layer!