
Lawn
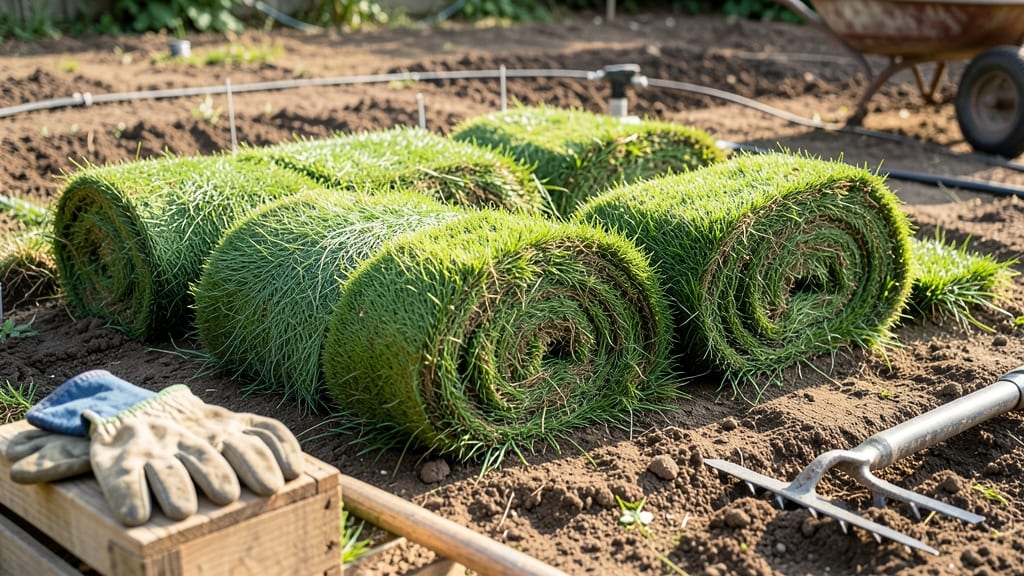
Your lawn can go from bare patches to lush, even coverage in just 14 days with lawn seed rolls—when you use the right moisture-locking technique. 🌱 I’ve seen neighbors struggle with clumpy seed or washed-out soil, but these rolls keep everything in place while protecting young sprouts from drying out.
The secret lies in proper installation and the first critical watering. The rolls come pre-seeded with a moisture-retaining shield that acts like a temporary blanket for tender roots.
You’ll need a rake, roller (or heavy board), sprinkler with fine mist, and a 1/4-inch layer of starter fertilizer—no fancy tools, just the right approach. This method beats traditional seeding because it eliminates wind scatter and ensures consistent germination across the entire area.
What you’ll end up with is a uniform carpet of grass that outpaces hand-seeding by weeks. The shield dissolves naturally, leaving no residue, and you’ll notice first blades within 7-10 days if conditions are right. Even in hot climates, the moisture barrier keeps roots hydrated until they establish.
For best results, plant in early fall or spring when temperatures hover between 60-75°F. Avoid summer heat or winter frost—those extremes stress young grass. Compare this to traditional seeding where you risk uneven coverage or seed loss to birds; rolls solve both problems in one step.
📚 In This Guide
- What you need
- Instructions
- Tips and common mistakes
- Wrapping up and next steps
What you need
- ● Lawn seed: High-quality grass seed blend (choose based on your climate—cool-season or warm-season). Quantity: ~5–10 lbs per 500 sq. ft. (adjust for bare spots or full lawn reseed).
- ● Moisture-locking shield: Biodegradable erosion control blanket or hydroseed mat (e.g., Erosion Control Blanket or Straw Mulch Mat). Size: Cover the seeded area with ~10–15% overlap.
- ● Water source: Garden hose with adjustable nozzle (or sprinkler system) for gentle, even watering.
- ● Measuring tape: To mark and measure the lawn area accurately.
- ● Garden rake: Fine-toothed for leveling soil and removing debris.
- ○ Broadcast spreader: (Optional but helpful) For even seed distribution. Capacity: 10–20 lbs for precision.
- ● Staple gun + biodegradable staples: (If using a non-sticky erosion blanket) to secure edges.
- ● Weather: Mild temperatures (50–75°F for cool-season grass; 65–85°F for warm-season). Avoid seeding before rain or extreme heat.
- ● Soil prep: Loose, level soil free of rocks/weeds. Test pH (ideal: 6.0–7.5) and amend if needed.
- ● Water access: Commit to daily watering (10–15 mins) for the first 2 weeks to keep the shield moist.
Step-by-Step instructions for creating lawn seed rolls
Here's how to create moisture-locking seed rolls that keep grass roots hydrated and protected during germination.
🌱 Step 1: Prepare the Base Layer for Moisture Retention
Start by laying down a 3-foot wide strip of burlap or landscape fabric across your prepared soil. This creates a breathable barrier that prevents weeds while allowing water to penetrate evenly. Secure the edges with landscape staples, ensuring no gaps appear—even a small opening can let moisture escape and dry out your seeds.
Next, spread a thin layer of 1/4-inch compost over the fabric. This adds essential nutrients while improving water retention. I like to use a rake to create gentle ridges in the compost—this helps the seed rolls sit slightly elevated, preventing water pooling that can suffocate young roots.
💧 Step 2: Apply Seed and Hydration Layer
Sprinkle 1/2 pound of grass seed evenly across the prepared area, following the manufacturer's recommended spacing for your grass type. Use a broadcast spreader for consistency—hand-scattering leads to thick patches that choke growth or thin spots where weeds take over. Lightly rake the seeds into the compost to ensure good soil contact without burying them too deep.
Water the area thoroughly until the soil feels deeply moist to 2 inches down. The key here is saturation without runoff—you want the water to soak in slowly. I like to use a gentle misting approach first, then finish with a steady stream to ensure the seeds stay in place while absorbing moisture.
☀️ Step 3: Roll and Secure for Protection
Unroll the biodegradable erosion control blanket over the seeded area, ensuring complete coverage. The blanket's mesh structure locks in moisture while allowing sunlight and air to reach the seeds. Press the edges firmly into the soil to create a seal—this prevents wind from lifting the blanket and exposing dry patches.
Secure the blanket with additional landscape staples every 12 inches along the edges and in the center. For larger areas, overlap strips by 6 inches to maintain continuous protection. The blanket should feel taut but not stretched—this ensures consistent contact with the soil and seeds underneath.
⏰ Step 4: Maintain Moisture and Monitor Growth
Check the rolls daily for the first 7-10 days, misting lightly if the blanket feels dry to the touch. The erosion control blanket retains moisture exceptionally well, but extreme heat or wind can still dry it out. Look for condensation on the blanket's surface—this is your signal that moisture levels are perfect.
Once you see first green shoots breaking through the blanket (usually 10-14 days after planting), remove the blanket completely. Be gentle—you don't want to disturb the delicate young plants. After removal, continue watering deeply 2-3 times per week to support root establishment in the now-exposed soil.
🌿 Step 5: Transition to Independent Growth
After 3-4 weeks, when the grass reaches 2-3 inches tall, it's time to mow for the first time. Set your mower to 3 inches high—this prevents scalping and encourages deeper root growth. The rolls should now be fully integrated into your lawn, with no visible signs of the original seed strips.
From this point, maintain regular watering 1 inch per week, adjusting for rainfall. You'll notice the grass from seed rolls establishes more quickly and uniformly than traditional seeding methods. The moisture-locking technique creates a stronger root system right from the start—perfect for high-traffic areas or new lawns.
Tips & tricks for perfect lawn seed germination
These practical strategies will help you maximize the effectiveness of your moisture-locking seed rolls while avoiding common pitfalls that can derail germination.
Material Selection: For Step 1, choose landscape fabric with a 0.5-1.0 ounce per square yard weight—this balance allows water penetration while blocking weeds effectively. I've found heavier fabrics (like 3 ounces) can trap too much moisture and create anaerobic conditions that stunt root growth. The 3-foot width mentioned in instructions works perfectly for most lawnmowers' cutting paths, making installation straightforward.
Seed Placement Precision: In Step 2, when applying the 1/2 pound of grass seed, use a stencil or string guide to maintain consistent spacing. I draw parallel lines 6 inches apart with spray paint before seeding—this creates uniform seed distribution that prevents thick patches. The gentle ridges you create in the compost during Step 1 actually help guide your rake for even seed coverage.
Blanket Installation: For Step 3, press the biodegradable erosion control blanket edges into the soil with a 2-inch wide screwdriver rather than just staples. This creates a deeper seal that prevents wind from lifting corners. I've seen blankets shift dramatically in high-wind conditions—taking that extra 5 minutes to press edges makes all the difference for consistent moisture retention.
Moisture Monitoring: During the critical 7-10 day maintenance period in Step 4, use a soil moisture meter to verify blanket moisture levels. The condensation check is good, but meters give precise readings when surface moisture might be misleading. I aim for 40-50% soil moisture during this phase—any lower risks germination failure, while higher levels can lead to fungal issues.
Pro Tips for Lawn Seed Rolls
- These practical strategies will help you maximize the effectiveness of your moisture-locking seed rolls while avoiding common pitfalls that can derail germination.
- Material Selection: For Step 1, choose landscape fabric with a 0.5-1.0 ounce per square yard weight—this balance allows water penetration while blocking weeds effectively.
- Seed Placement Precision: In Step 2, when applying the 1/2 pound of grass seed, use a stencil or string guide to maintain consistent spacing.
Frequently asked questions
Got questions about lawn seed rolls? You’re not alone!
Here’s a quick guide to the most common concerns—so you can roll out a lush lawn with confidence.
What’s the best time of year to use lawn seed rolls?
For cool-season grasses (like fescue or ryegrass), plant seed rolls in early fall or late spring when temps are 60–75°F. Warm-season grasses (like Bermuda or Zoysia) thrive in late spring or early summer (75–85°F). Avoid extreme heat or frost—your seeds need consistent moisture to germinate!
How long does it take for lawn seed rolls to germinate?
Germination time varies by grass type:
- Cool-season grasses: 7–21 days
- Warm-season grasses: 10–30 days
Do I need to water differently with seed rolls than loose seed?
Yes! Seed rolls have a moisture-locking shield, but you’ll still need to water lightly 2–3 times daily (about 5–10 minutes per session) for the first 2 weeks. Avoid heavy watering—it can wash away seeds or disrupt the roll’s protective layer. Once sprouts appear, switch to deep, infrequent watering (1 inch per week).
Can I use lawn seed rolls on an existing lawn?
Seed rolls are great for overseeding thin or patchy areas. Mow the existing grass short (1–2 inches), rake lightly to loosen soil, then lay the rolls seam-side down. Water thoroughly to help them stick. Just avoid rolling over thick weeds—they’ll compete with your new grass.
What should I do if my seed rolls dry out or curl before planting?
Don’t panic! If rolls dry out, soak them in water for 10–15 minutes before laying them out. If they curl, gently flatten them with your hands or a roller. For stubborn curls, unroll slightly and re-moisten the edges. Pro tip: Store unused rolls in a cool, shaded place (like a garage) to prevent drying.
Are there alternatives to lawn seed rolls for small patches?
For tiny bare spots (under 2 sq ft), loose seed + a starter fertilizer works fine. For larger areas, consider hydraulic seed (pre-mixed with mulch) or sod sheets (instant grass). Seed rolls shine for uniform coverage on medium-to-large lawns—no mess, no gaps!
Wrapping up and next steps
Transforming your lawn with lawn seed rolls is a game-changer for quick, even germination—especially in tough conditions! 🌱 By locking in moisture and shielding seeds from wind or erosion, you’re giving your grass the best possible start.
Whether you’re patching bare spots or overseeding for a lush carpet, this method saves time and effort while boosting success rates.
Ready to take the next step? Grab your materials, roll up your sleeves, and give your lawn the revival it deserves! Start small, test a section, and watch your green dreams grow into reality. Happy seeding! 🌿