
Lawn
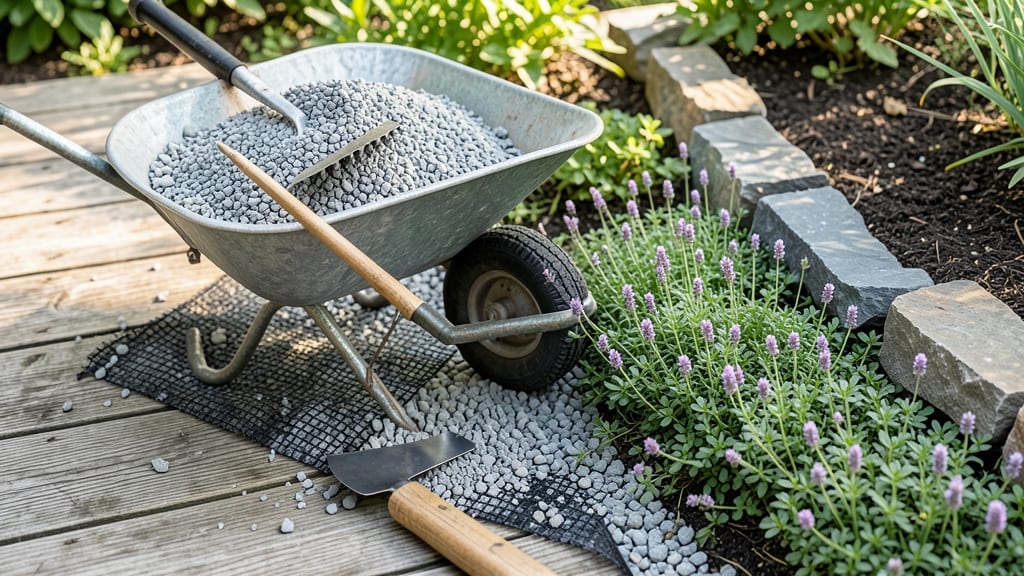
Replacing your lawn with gravel isn’t just about saving time—it’s about reclaiming your weekends from mowing, watering, and patching brown spots. 🌱 I swapped my entire front yard last spring, and the difference is shocking: no more gas cans, no more backaches, and a space that actually looks intentional.
The key is choosing the right gravel (crushed stone for drainage, pea gravel for a softer look) and laying down landscape fabric first to block weeds.
My neighbors thought I’d gone crazy at first—until they saw how little I watered and how good the place looked without a single blade of grass. You’ll end up with a surface that stays cool in summer, drains rain instantly, and never needs reseeding.
The only maintenance is an occasional rake to keep it level, and even that’s optional if you choose the right size stones. Works for any climate (hot, cold, or drought-prone) and adapts to modern or rustic styles. Here’s exactly how to make the switch without regrets.
📚 In This Guide
- What you need
- Instructions
- Tips and common mistakes
- Wrapping up and next steps
What you need
- ● Gravel: 3–4 inches deep (crushed stone, pea gravel, or decomposed granite). Calculate 1.5–2 tons per 100 sq. ft. (e.g., 500 sq. ft. = ~7.5–10 tons). Pro tip: 💡 Choose polyhedral gravel (sharp edges) for stability or rounded pea gravel for a softer look.
- ○ Landscape Fabric: 1.5–2 oz. per sq. ft. (blocks weeds without suffocating soil). Optional: Use geotextile fabric if drainage is a concern.
- ○ Edging Material: Metal, plastic, or rubber (4–6 inches tall) to define borders. Optional: Natural stone or pavers for a premium finish.
- ● Base Material: Crushed limestone or sand (1–2 inches deep) for drainage. Skip this if your soil drains well.
- ○ Mulch or Bark Dust: Optional (1–2 inches) along edges to suppress weeds.
- ● Essentials: Shovel or spade
- ● Wheelbarrow (for hauling gravel)
- ● Rake (for leveling)
- ● Plate compactor (rent or buy for ~$50–$100)
- ● Measuring tape + string (to mark boundaries)
- ● Safety gear (gloves, goggles, knee pads)
- ○ Optional (but helpful): Vibratory plate compactor (for large areas)
- ● Garden hose (to rinse fabric)
- ● Stakes + line level (for precise edging)
- ● ✅ Clear the area: Remove grass, weeds, and debris (use a sod cutter or smother with cardboard for 2+ weeks).
- ● ✅ Check local codes: Some areas restrict gravel depth or require permits for large projects.
- ● ✅ Test soil drainage: Dig a 12-inch hole, fill with water. If it drains in <4 hours, you may skip the base layer.
- ● ✅ Plan for slopes: Steep areas? Add retaining walls or terraces to prevent erosion.
Step-by-step guide to replacing your lawn with gravel
This is how I transformed my high-maintenance lawn into a stunning, hassle-free gravel garden—no more mowing, watering, or weed wars.
🪴 Step 1: Mark and Remove the Existing Lawn
Use wooden stakes and string to outline your gravel area. I like to draw a rough sketch first to visualize the shape—this prevents mistakes when digging. Once marked, remove the existing grass using a sod cutter or spade, working in small sections. Lift the sod carefully to avoid tearing, then stack it for composting or disposal.
Don’t rush this step. If you leave patches of grass, they’ll grow back through the gravel and create a messy look. I dig down about 4-6 inches to ensure a clean break from the soil below. For larger areas, rent a sod cutter to save time—it makes the job feel like a breeze.
💧 Step 2: Level the Soil and Add a Base Layer
After removing the sod, rake the soil smooth with a landscape rake. You want a flat, even surface so water drains properly and the gravel looks neat. I use a 2x4 board as a level to check for high or low spots—just drag it across the area and fill in dips or scrape off high points.
Next, add a 2-inch layer of compactable gravel or crushed stone as a base. This prevents weeds from pushing up through the gravel and provides stability. Use a hand tamper or rented plate compactor to press it down firmly. If your soil is clay-heavy, add a 1-inch layer of coarse sand first to improve drainage—this is a game-changer for preventing puddles.
✂️ Step 3: Install Edging and Add the Final Gravel Layer
Install plastic, metal, or stone edging to keep the gravel in place and create clean borders. I bend the edging slightly into the ground to secure it—this prevents shifting over time. For curves, use flexible plastic edging; for straight lines, metal or stone works best.
Now, spread the gravel evenly over the base layer. I use ¾-inch to 1-inch washed gravel for a natural look, but smaller pebbles work too. Aim for a 3-4 inch depth—this gives enough coverage while allowing water to drain. Rake the gravel gently to create a uniform, slightly textured finish. Avoid walking on it until you’re done, or you’ll leave footprints.
☀️ Step 4: Compact and Add Finishing Touches
Use a hand tamper to compact the gravel one last time. This step is crucial—it prevents settling and keeps the surface stable. I work in small sections, pressing down firmly but not too hard to avoid shifting the edging. For larger areas, rent a vibrating plate compactor for faster results.
Finally, add decorative elements like stepping stones, mulch borders, or small plants if desired. I like to sprinkle a thin layer of polished river rock along the edges for a polished look. Water the area lightly after installation to help the gravel settle into place. Now, sit back and enjoy your low-maintenance landscape—no more mowing, no more weeds, just pure ease.
Tips & tricks for perfect gravel landscaping
A few key strategies that'll help you avoid common pitfalls and create a gravel area that lasts for years.
Precision in Step 1: When marking your gravel area, use a garden hose to trace the outline before driving stakes. This gives you a visual reference to adjust your sketch—trust me, it saves headaches later when you realize the area is too small. For the 4-6 inch dig depth, use a measuring tape to check at multiple points. Uneven digging leads to uneven gravel coverage, and nobody wants a patchwork look.
Base Layer Secrets: The 2-inch compactable gravel base is non-negotiable, but here's what nobody tells you—rent a plate compactor for just a few hours if you're doing more than 50 square feet. Hand tampers work for small areas, but for larger spaces, that base layer needs serious compaction to prevent future settling. If your soil is particularly sandy, consider adding a landscape fabric between the soil and base layer to prevent fine particles from mixing in.
Gravel Depth Matters: The 3-4 inch top layer might seem like a range, but I recommend sticking with 3.5 inches for most applications. This gives enough coverage to hide soil while still allowing proper drainage. For areas with heavy foot traffic, consider going to 4 inches. Pro tip: Use a straightedge (like a 2x4) to check depth at multiple points—grab a handful of gravel and let it sift through your fingers to judge consistency.
Edging Essentials: Don't skimp on edging—it's what keeps your gravel looking crisp for years. For curves, use flexible plastic edging and cut it with heavy-duty scissors. For straight lines, metal or stone edging creates a more permanent look. Here's my secret: After installing edging, use a rubber mallet to gently tap it into place at the base. This prevents shifting when you start spreading gravel.
Pro Tips for Replace Lawn With Gravel
- A few key strategies that'll help you avoid common pitfalls and create a gravel area that lasts for years.
- Precision in Step 1: When marking your gravel area, use a garden hose to trace the outline before driving stakes.
- Base Layer Secrets: The 2-inch compactable gravel base is non-negotiable, but here's what nobody tells you—rent a plate compactor for just a few hours if you're doing more than 50 square feet.
Frequently asked questions
about replacing your lawn with gravel can help you make an informed decision. Here are some common queries—and their answers!Will gravel attract pests like ants or rodents?
Gravel alone won’t attract pests, but organic debris (leaves, grass clippings) can. Keep the area clean and use a fine gravel (3/8" or smaller) to discourage burrowing. A thin layer of landscape fabric beneath the gravel adds extra protection.
How long does it take to install gravel instead of grass?
For a DIY project, expect 1–3 days depending on yard size. Key steps like removing sod, leveling, and laying fabric take the most time. Renting a sod cutter or hiring help can speed it up. Plan for drying time if using a weed barrier.
Is gravel cheaper than maintaining a lawn long-term?
Yes!
Upfront costs vary ($1–$3 per sq. ft.), but you’ll save 80%+ on mowing, watering, fertilizing, and repairs over 5–10 years. Gravel lasts decades with minimal upkeep, while lawns require constant care.
Will gravel wash away in heavy rain or floods?
Not if installed correctly! Use edging (plastic, metal, or concrete) to contain the gravel and compact it well. A slight slope (1–2%) away from structures helps with drainage. For flood-prone areas, opt for larger gravel (1"–2") to reduce erosion.
Can I still plant flowers or shrubs in gravel?
Use container gardening or create "gravel gardens" with drought-tolerant plants (succulents, lavender, sedum). Bury landscape fabric first to block weeds, then add soil pockets for roots. Just avoid overwatering—gravel drains quickly!
Does gravel freeze in winter or become slippery?
Gravel stays walkable in light snow but may compact under heavy snow/ice. For driveways or high-traffic areas, use coarser gravel (3/4"–1") and add sand for traction. A leaf blower keeps it clear—no shoveling!
Wrapping up and next steps
Replacing your lawn with gravel isn’t just a smart move for reducing chores—it’s a game-changer for low-maintenance, eco-friendly landscaping that saves time, water, and money. Whether you’re tired of mowing or want a durable, versatile outdoor space, gravel offers endless possibilities with minimal effort. 🌱✨
Ready to transform your yard? Start small—pick a high-traffic area or a section you’ve always wanted to change—and take the plunge! Your future self (and your lawnmower) will thank you.