
Lawn
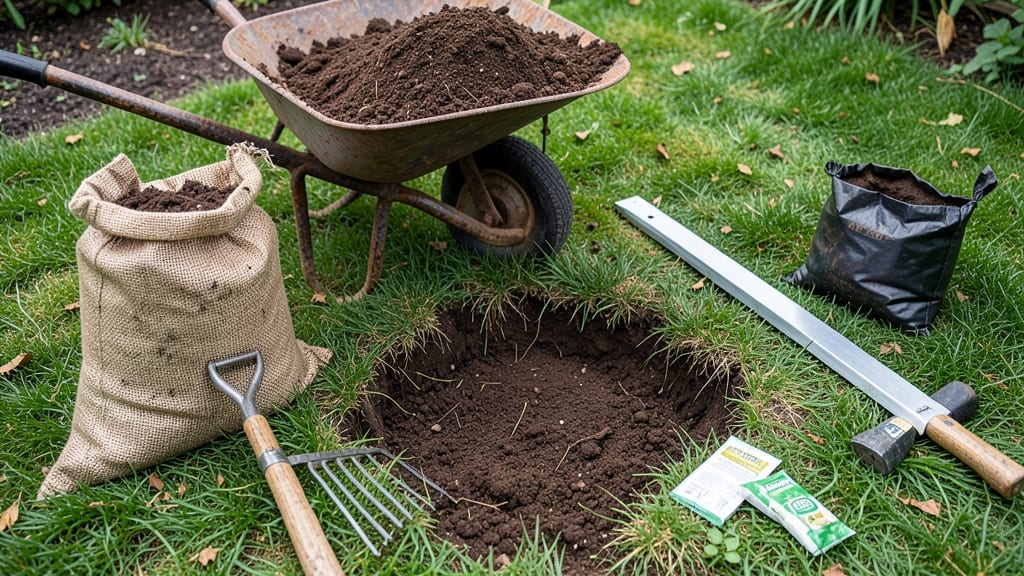
Filling large low spots in your lawn isn't just about dumping dirt—it's about creating a foundation that lasts. 🌱 I've filled more than my share of dips and divots, and the difference between a quick fix and a permanent solution comes down to three things: the right fill material, proper drainage, and choosing grass that thrives in your climate.
The first step is diagnosing why the spot exists—is it from foot traffic, erosion, or poor drainage? Once you know, you'll pick your fill: topsoil for new grass, compost for organic boosts, or sand for drainage issues.
My go-to is a mix of topsoil and compost to level the ground while adding nutrients for the new grass.
After leveling, you'll see that uneven lawn transform into a smooth, thriving patch within weeks. The key is selecting grass seed that matches your sun exposure and watering habits—once established, it'll blend seamlessly with the rest of your lawn.
This method works for backyard dips, sports field repairs, or even those pesky erosion spots near driveways. The secret? Take your time with the edges and keep the soil moist until the new grass takes hold. Let's get that lawn looking uniform again!
📚 In This Guide
- What you need
- Instructions
- Tips and common mistakes
- Wrapping up and next steps
What you need
- ● Topsoil: 4–6 bags (or ~1 cubic yard for a 10’x10’x6” deep spot; adjust based on size). Use screened, compost-amended topsoil for best results.
- ● Lawn seed: 1–2 lbs (match seed type to your existing grass). Fast-germinating blends (like ryegrass) work best for quick coverage.
- ○ Compost or peat moss: 1–2 bags (optional but helps with soil fertility and drainage).
- ● Rake (bow rake or leaf rake): For spreading soil and leveling the area.
- ● Shovel or spade: A flat-edged shovel (12–18” wide) for moving soil efficiently.
- ● Wheelbarrow: To haul soil and other materials around easily.
- ● Level (4’ or 2’): Ensures your spot is perfectly even with the rest of the lawn.
- ● Garden hose with spray nozzle: For wetting the area before and after seeding.
- ○ Lawn roller (optional but helpful): A lightweight roller (30–50 lbs) to firm up soil and seed.
- ● Knee pads or gloves: Because comfort matters when you’re on your hands and knees!
- ● Soil conditioner (e.g., gypsum or lime): If your soil is clay-heavy or acidic.
- ● Erosion control blanket: For steep slopes or high-risk areas to prevent washout.
- ● Stakes and string: To mark level reference points if the spot is large.
- ● Broadcast spreader: For even seed distribution (if you’re seeding a big area).
- ● Mulch or straw: 1–2 bales to protect seeds from birds and drying out.
Step-by-Step instructions for leveling large lawn low spots
Here's how I quickly fill and restore those unsightly dips—no waiting months for grass to grow back.
🪴 Step 1: Measure and Mark the Low Spot
Use a level or straight board to determine how deep the low spot is. Place one end on the surrounding lawn and the other on the low area—measure the gap with a ruler. I usually find spots need 1-3 inches of fill. Mark the edges with spray paint or stakes to define the repair area clearly.
Don't eyeball it—uneven filling leads to new low spots later. I like to extend my marked area 6 inches beyond the visible dip to create a gradual slope that blends with the rest of the lawn.
💧 Step 2: Remove Debris and Loosen Existing Soil
Rake out all dead grass, rocks, and debris from the marked area. Use a shovel to loosen the compacted soil underneath—this helps new fill settle properly. I work the soil until it feels crumbly and about 3-4 inches deep in the loosened area.
This step prevents future settling. If you skip loosening, the fill will compact unevenly and create new dips within weeks. A garden fork works best for breaking up tough soil without disturbing surrounding grass.
☀️ Step 3: Add Topsoil in Thin Layers
Spread 1 inch of topsoil over the prepared area using a rake. Don't dump it all at once—compaction will happen, and you'll need more fill later. I like to work in 3-4 inch sections at a time, spreading evenly and leveling with the rake.
After each layer, water lightly to help it settle. Wait 10-15 minutes before adding the next inch. This prevents air pockets and ensures the fill compacts naturally. For a 2-inch dip, you'll need 2 layers of topsoil.
🌱 Step 4: Blend and Seed the Repaired Area
Once the fill is level with the surrounding lawn, blend the edges by raking soil slightly onto the higher areas. This creates a smooth transition. Use a lawn roller to firm everything lightly—this prevents future settling.
Sprinkle grass seed evenly over the area (use the same type as your existing lawn). Cover lightly with a thin layer of topsoil or compost to protect seeds from birds and drying out. Water gently but thoroughly until the soil is 1 inch deep moist.
⏰ Step 5: Water and Monitor for Full Establishment
Keep the area moist for the first 2 weeks—water lightly every 2-3 days until you see new grass blades. Avoid heavy watering that washes away seeds. I set a reminder to check soil moisture by sticking my finger in—it should feel damp but not soggy.
After 4 weeks, the new grass should be established enough to handle normal lawn traffic. If you see bare patches, spot-seed and water again. This method gives you a seamless repair in 30-45 days—not the months you'd wait with patchy grass.
Tips & tricks for perfect lawn leveling
Here's what I've learned after fixing dozens of unsightly dips—these tricks make all the difference between a temporary fix and a lasting repair.
Precision Measurement: In Step 1, don't just guess the depth—use a level or straight board for accuracy. I've seen people eyeball a 2-inch dip and end up adding only 1 inch of fill, which leaves the spot visible after settling. For best results, measure at multiple points around the low area and average the depth. This ensures you calculate exactly how much topsoil you'll need for those 1-3 inches of fill.
Soil Prep Secret: When loosening soil in Step 2, go deeper than you think you need—about 3-4 inches. I learned this the hard way when a shallow loosening caused the fill to sink unevenly after just one mowing. Use a garden fork to break up the subsoil without disturbing the surrounding grass. This creates a stable base that won't compact under foot traffic.
Layering Technique: The key to Step 3 is patience with those 10-15 minute settling periods between layers. I've rushed this step before and ended up needing an extra bag of topsoil to fix the uneven surface. After spreading each 1-inch layer, water lightly and let it settle completely before adding more. For deeper dips, work in 3-4 inch sections to maintain even pressure across the entire area.
Edge Blending: In Step 4, don't just stop at the original lawn level—rake soil slightly onto the higher areas to create a 6-inch gradual slope. This prevents sharp transitions where water pools or mower blades catch. After seeding, I like to use a lawn roller lightly to firm everything—just enough to prevent future settling without compacting the seeds.
Pro Tips for Fill Large Low Spots In Lawn
- Here's what I've learned after fixing dozens of unsightly dips—these tricks make all the difference between a temporary fix and a lasting repair.
- Precision Measurement: In Step 1, don't just guess the depth—use a level or straight board for accuracy.
- Soil Prep Secret: When loosening soil in Step 2, go deeper than you think you need—about 3-4 inches.
Frequently asked questions
Got questions about filling those pesky low spots in your lawn? You’re not alone!
Here are some of the most common concerns—and straightforward answers—to help you level your yard like a pro.
What’s the best time of year to fill and seed low spots?
The ideal window is early fall (September–October) or late spring (April–May). Cooler temps and consistent moisture help seeds germinate faster. Avoid summer—heat dries out soil and seeds too quickly. If you must fix spots in summer, water deeply twice daily until germination.
Can I use regular dirt instead of topsoil to fill low spots?
Not ideal! Regular dirt often contains rocks, clay, or debris that can compact and prevent grass from growing. Topsoil is lighter, nutrient-rich, and drains better. For deep holes, mix topsoil with compost (20% compost) to improve fertility and water retention.
How long does it take for grass seed to grow in filled low spots?
With proper care, you’ll see sprouts in 7–14 days and a lush patch in 4–6 weeks. Key factors: consistent watering (1/4 inch daily), avoiding foot traffic, and keeping the area weed-free. If growth is slow, test soil pH—aim for 6.0–7.0 for most grasses.
Why did my filled spot sink again after watering?
This usually means the soil settled or didn’t drain well. Try these fixes:
- Add a 1-inch layer of sand (for clay-heavy soil) to improve drainage before topsoil.
- Compact the topsoil lightly with a plate compactor or rolled lawn roller.
- Water gently to avoid erosion—use a soaker hose on low settings.
What tools do I need beyond topsoil and seed?
Here’s your must-have checklist:
Tool
Purpose
Shovel or spade
Digging and shaping low spots
Rake (bow or leaf)
Smoothing topsoil and leveling edges
Plate compactor or lawn roller
Firming soil to prevent settling
Soaker hose or sprinkler
Consistent watering without erosion
Wrapping up and next steps
Filling those pesky low spots in your lawn doesn’t have to be a daunting task—with the right materials, a little elbow grease, and patience, you’ll have a smooth, even surface in no time! 🌱 Whether you opt for topsoil, sand, or compost, the key is preparation, proper layering, and consistent care to ensure your new grass takes root and thrives.
Remember, a well-maintained lawn isn’t just about looks; it’s a testament to your dedication and the pride you’ll feel every time you step outside.
Ready to transform your lawn? Start small—tackle one section at a time—and soon, you’ll be enjoying a lush, level yard that’s the envy of the neighborhood. Grab your tools, roll up your sleeves, and get to work! 🚜✨