
Lawn
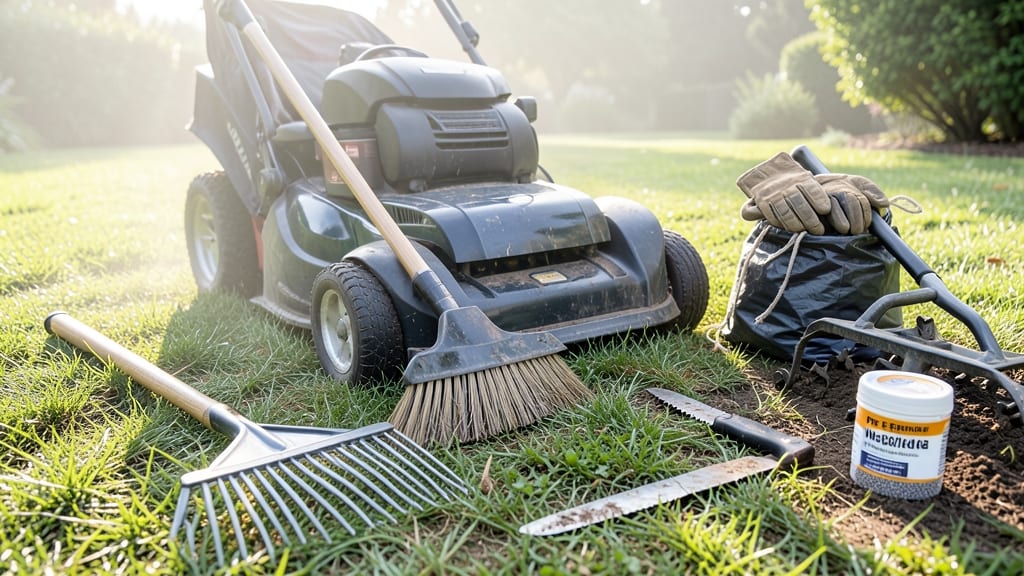
Spring’s best-kept secret? A one-hour lawn spring clean-up that transforms patchy winter damage into year-round lushness. 🌱 After years of fighting brown patches and weeds, I learned this routine—done right after frost but before summer’s heat—makes all the difference.
The key isn’t just cleaning up; it’s setting your grass up to thrive for the next 12 months.
Start with the basics: rake away thatch and debris (a stiff-bristle rake works best), then adjust your mower height to 3-4 inches—higher than you think. This single step keeps grass roots cool, retains moisture, and crowds out weeds naturally.
I skip the fancy tools; a good rake, sharp mower blade, and a little elbow grease do the trick for most lawns.
What you’ll end up with is grass that looks fresh, even, and resilient by summer. The secret? Aerating in early spring (rent a core aerator if you don’t own one) and applying a slow-release fertilizer—no chemicals needed.
My lawn stays green through droughts now, and the weeds? Almost nonexistent. It’s the little things that make the biggest difference.
Works for any lawn size, from small suburban yards to large backyards. The best part? You’ll notice the difference in just a few weeks. Let’s get that grass looking its best for the season ahead.
📚 In This Guide
- What you need
- Instructions
- Tips and common mistakes
- Wrapping up and next steps
What you need
- ● Lawn rake: A sturdy bow rake (18–24" wide) for debris removal and a leaf rake (24–36" wide) for larger areas.
- ● Garden gloves: Heavy-duty, waterproof gloves (1–2 pairs) to protect your hands.
- ● Trimmer/string trimmer: A gas or electric model (20–24" cutting width) for edges and tight spots.
- ● Lawn mower: A sharp, well-maintained mower (set blades to 2–3" for spring).
- ● Shovel or edging tool: For digging out weeds or reshaping beds.
- ● Pruners: Bypass pruners (for clean cuts) and loppers (for thicker branches).
- ● Wheelbarrow or large bags: 2–3 sturdy bags (30–50 gallons) or a wheelbarrow for hauling debris.
- ● Hose with nozzle: For rinsing tools and wetting dry grass before mowing.
- ● Leaf blower: Speeds up cleanup in large yards.
- ● Soil aerator: If your lawn needs core aeration (rent or buy a manual/spike aerator).
- ● Pre-emergent herbicide: Apply after cleanup to prevent weeds (follow label instructions).
- ● Knee pads: For comfort during weeding or raking.
- ● Sunscreen & hat: Because spring sun sneaks up on you! ☀️
Instructions: how to reset your lawn for spring growth
Here’s how to transform your lawn from winter’s sleep to spring’s lushness in just one focused hour.
🪴 Step 1: Clear Debris and Rake Up Winter’s Leftovers
Start by walking your lawn to spot any lingering debris—leaves, twigs, or thatch—that smothered grass over winter. Use a stiff rake to pull out larger clumps, then switch to a leaf rake for finer debris. Focus on edges, low spots, and under trees where debris collects. You’ll notice your lawn looks instantly cleaner, and grass can finally breathe.
Don’t skip this step—thick thatch (over ½ inch) blocks water and air, strangles roots, and invites pests. If you see a spongy layer, use a dethatching rake to loosen it. Work in 10-foot sections to avoid fatigue, and bag the debris for compost or disposal. Real talk: A few stubborn patches might need a second pass, but persistence pays off.
✂️ Step 2: Mow at the Right Height for Spring Revival
Set your mower to its highest setting—usually 3-4 inches—and give your lawn its first haircut of the season. Tall grass shades out weeds and holds moisture better, so don’t scalp it. Bag the clippings if they’re long and brown (a sign of winter stress), but leave short, green clippings—they’ll decompose into natural fertilizer.
Mow when the grass is dry but not brittle (early morning is ideal). You’ll see a dramatic difference in texture and color after just one pass. Pro tip: Sharpen your mower blade first—dull blades tear grass instead of cutting cleanly, leaving ragged edges that invite disease.
💧 Step 3: Aerate Compacted Soil for Deep Root Growth
Rent a core aerator (or use a garden fork if your lawn is small) to punch 3-4 inch deep holes every 2-3 inches apart. This breaks up compacted soil, letting air, water, and nutrients reach grass roots. Walk slowly—don’t rush, or you’ll miss spots. You’ll feel the resistance as you push through layers of compressed earth, and that’s a good thing.
After aerating, spread a ¼ inch layer of compost over the entire lawn (use the 2 bags you prepped earlier). Lightly rake it in so it settles into the holes. This feeds roots without smothering grass. Water lightly to help it sink in. The goal? Soil that’s loose enough for roots to explore, not a rock-hard surface.
☀️ Step 4: Test Soil and Feed for Spring’s Best Start
Use the soil test kit to check pH and nutrient levels. Most lawns need 6.0-7.0 pH for optimal growth—if yours is off, adjust with lime (for low pH) or sulfur (for high pH) as the kit instructs. Then, spread the 10 lbs of slow-release fertilizer evenly, using a broadcast spreader. Water immediately to activate the granules.
Watch for signs of improvement in 7-10 days: darker green blades, fewer bare patches, and a springier feel underfoot. Over-fertilizing now can burn grass, so follow the kit’s recommendations precisely. I know it’s tempting to go heavy, but patience here means stronger roots later.
🌱 Step 5: Seed Bare Spots and Mulch for Weed Control
Fill thin or bare areas with the 5 lbs of grass seed, pressing it lightly into the soil. Water gently to keep seeds in place, then cover with a ¼ inch of straw mulch (use the 1 bale you set aside). This protects seeds from drying out and blocks weeds. You’ll see tiny green shoots in 10-14 days—that’s your reward for prep work.
Finally, apply the pre-emergent herbicide (if using) to prevent weeds from germinating. Water lightly after to activate it. Skip this if you’re seeding heavily—weeds won’t compete with thick grass. Now step back and admire your work. Your lawn’s spring revival starts here.
Tips & tricks for perfect lawn spring revival
Your lawn’s transformation starts with these game-changing tricks that’ll make all the difference between a so-so spring and a showstopper.
Equipment Prep: Renting a core aerator? Check for sharp tines first—dull ones won’t penetrate compacted soil properly. I learned this the hard way after struggling with a borrowed machine that kept clogging. A quick blade inspection saves time and frustration. For small lawns, a garden fork works just as well if you’re willing to put in elbow grease—push it down firmly in a grid pattern, twisting slightly to break up soil.
Timing Secret: The early morning hours (before 9 AM) are ideal for all outdoor work—grass is dry but not brittle, and you’ll avoid the afternoon heat that can stress newly aerated soil. If you must work later, water the lawn lightly beforehand to prevent stress. And here’s a pro move: After aerating, spread compost while the soil is still slightly damp—it’ll settle more evenly into those fresh holes.
Soil Test Accuracy: Don’t rely on a single soil test result to dictate your entire lawn’s needs. Take samples from different areas—shady spots, sunny patches, and problem zones—since conditions vary dramatically. I once adjusted pH based on one test, only to realize the sunny side needed different treatment. Mix your samples thoroughly before sending them off for testing to get the most accurate reading.
Seed Success: When pressing grass seed into bare spots, aim for firm but gentle pressure—you want seeds in contact with soil, not buried too deep. Think of it like tucking a blanket around a baby: snug but not smothering. After seeding, keep the area moist (not soggy) for the first 10-14 days by watering lightly twice daily. The mulch layer helps retain moisture, but don’t skip those waterings—consistency is key for germination.
Pro Tips for Lawn Spring Clean Up
- Your lawn’s transformation starts with these game-changing tricks that’ll make all the difference between a so-so spring and a showstopper.
- Equipment Prep: Renting a core aerator?
- Timing Secret: The early morning hours (before 9 AM) are ideal for all outdoor work—grass is dry but not brittle, and you’ll avoid the afternoon heat that can stress newly aerated soil.
Frequently asked questions
Got questions about tackling your lawn spring clean-up?
You’re not alone—every spring brings a fresh round of curiosity (and maybe a little panic) about how to get your yard back in shape. Here are the answers to the most common questions to help you prep like a pro.
When is the exact best time to do a spring lawn clean-up?
The ideal window is late March to early May, once the soil is workable (no mud!) and before summer heat stress kicks in. Aim for 50–60°F days—cool enough to avoid wilting grass but warm enough for growth. If you miss this, don’t sweat it; just prioritize removing debris ASAP to prevent fungal issues.
Do I really need to dethatch if my lawn looks fine?
Not always! Check for thatch layers over ½ inch thick (lift a small patch—if it feels spongy, it’s time). Thin thatch lets water/nutrients reach roots, but skip if your grass is healthy and you’ve aerated recently. Over-dethatching can damage roots, so test first—your lawn might just need a mow and feed instead.
Can I use my regular mower to clean up leaves/debris after winter?
Not ideal! A mulching mower can handle light debris, but for thick layers of leaves, twigs, or thatch, switch to a bagging mower or rake first. Sharp mower blades can tear grass, leaving it vulnerable to disease. Pro tip: Mow high (3–4 inches) during clean-up to protect roots while you work.
What’s the deal with those weird bugs crawling out after I rake?
Don’t panic—those are likely springtails, pill bugs, or beetles, harmless lawn critters feasting on decaying organic matter. They’ll vanish once you remove debris. If you spot ants or grubs, focus on aerating (they hate air!) and consider beneficial nematodes for long-term control.
Is hiring a pro worth it if I’ve never done this before?
A pro can spot hidden issues (like soil compaction or pests) and save you time/money long-term. Budget $100–$300 for a basic clean-up, or split costs with neighbors. DIY? Start small—tackle one zone (like edges or a shady patch) first to build confidence. Either way, you’ll learn for next year!
What’s the fastest way to fix brown patches after winter?
Brown spots often mean thatch, fungus, or compacted soil. Rake out debris, aerate lightly (rent a core aerator), and top-dress with compost. For fungal spots, apply a fungicide or mix baking soda + water (1 tbsp/gallon) as a DIY spray. Water deeply 2x/week to encourage recovery.
Wrapping up and next steps
A spring clean-up isn’t just about tidying up—it’s your lawn’s fresh start for the year! 🌱 By tackling debris, mowing, fertilizing, and aerating in just one hour, you’ve set the stage for lush, healthy grass that’ll wow neighbors and make your outdoor space shine.
Now that you’re armed with the right tools and tips, grab your gloves and get outside! Start small—pick one task today, then build momentum. Before you know it, your lawn will be the envy of the block, and you’ll be the proud (and relaxed) gardener behind it.